Introduction Electronics/Wearable Project
Interdisciplinary Project Winter Semester 2018/2019
Rhine-Waal University of Applied Sciences FabLab Kamp-Lintfort
Group:Fabrication for Care
Week 8:Introduction to electronics,discussion about the final project of the group Fabrication for Care-forming groups,DIY Sensors,Introduction to Engeenering design processes,Introduction to the company Bottroper Werkstaten GmbH working with people with disabilities,Introduction to the Knitting machine
Introduction to electronics/Wearable Project and DIY Sensors


source:https://www.google.de/searchq=electronics+wearable+project&rlz=1C1EKKP_enDE824DE824&source
source:https://www.google.de/search?rlz=1C1EKKP_enDE824DE824&biw=1280&bih=539&tbm=isch&sa=1&ei=6GIFXOygLMfUwAL_ybagDw&q=electronics&oq=electronics&gs_l=img.3..35i39l2j0l8.245957.248326..248692...0.0..0.228.2078.0j8j3......1....1..gws-wiz-img.......0i67.1Uq-x27RHGg#imgrc=j3ILDM1kgojKkM:
lnms&tbm=isch&sa=X&ved=0ahUKEwiyroKNg4TfAhWEXSwKHWcmBa4Q_AUIDigB&biw=1280&bih=539#imgdii=_TGG9hUtFOR7DM:&imgrc=kH13YmkXnWESaM:
Learning about the basic electronics is an essential part of the everyday life of the humans.It is vital to have a basic view on different electonic components and how they are actually work.On the other hand,when learning this the people are able to make a lot of things by themselves and also to help them to gain skills for making our own project.
Process of making DIY Sensor
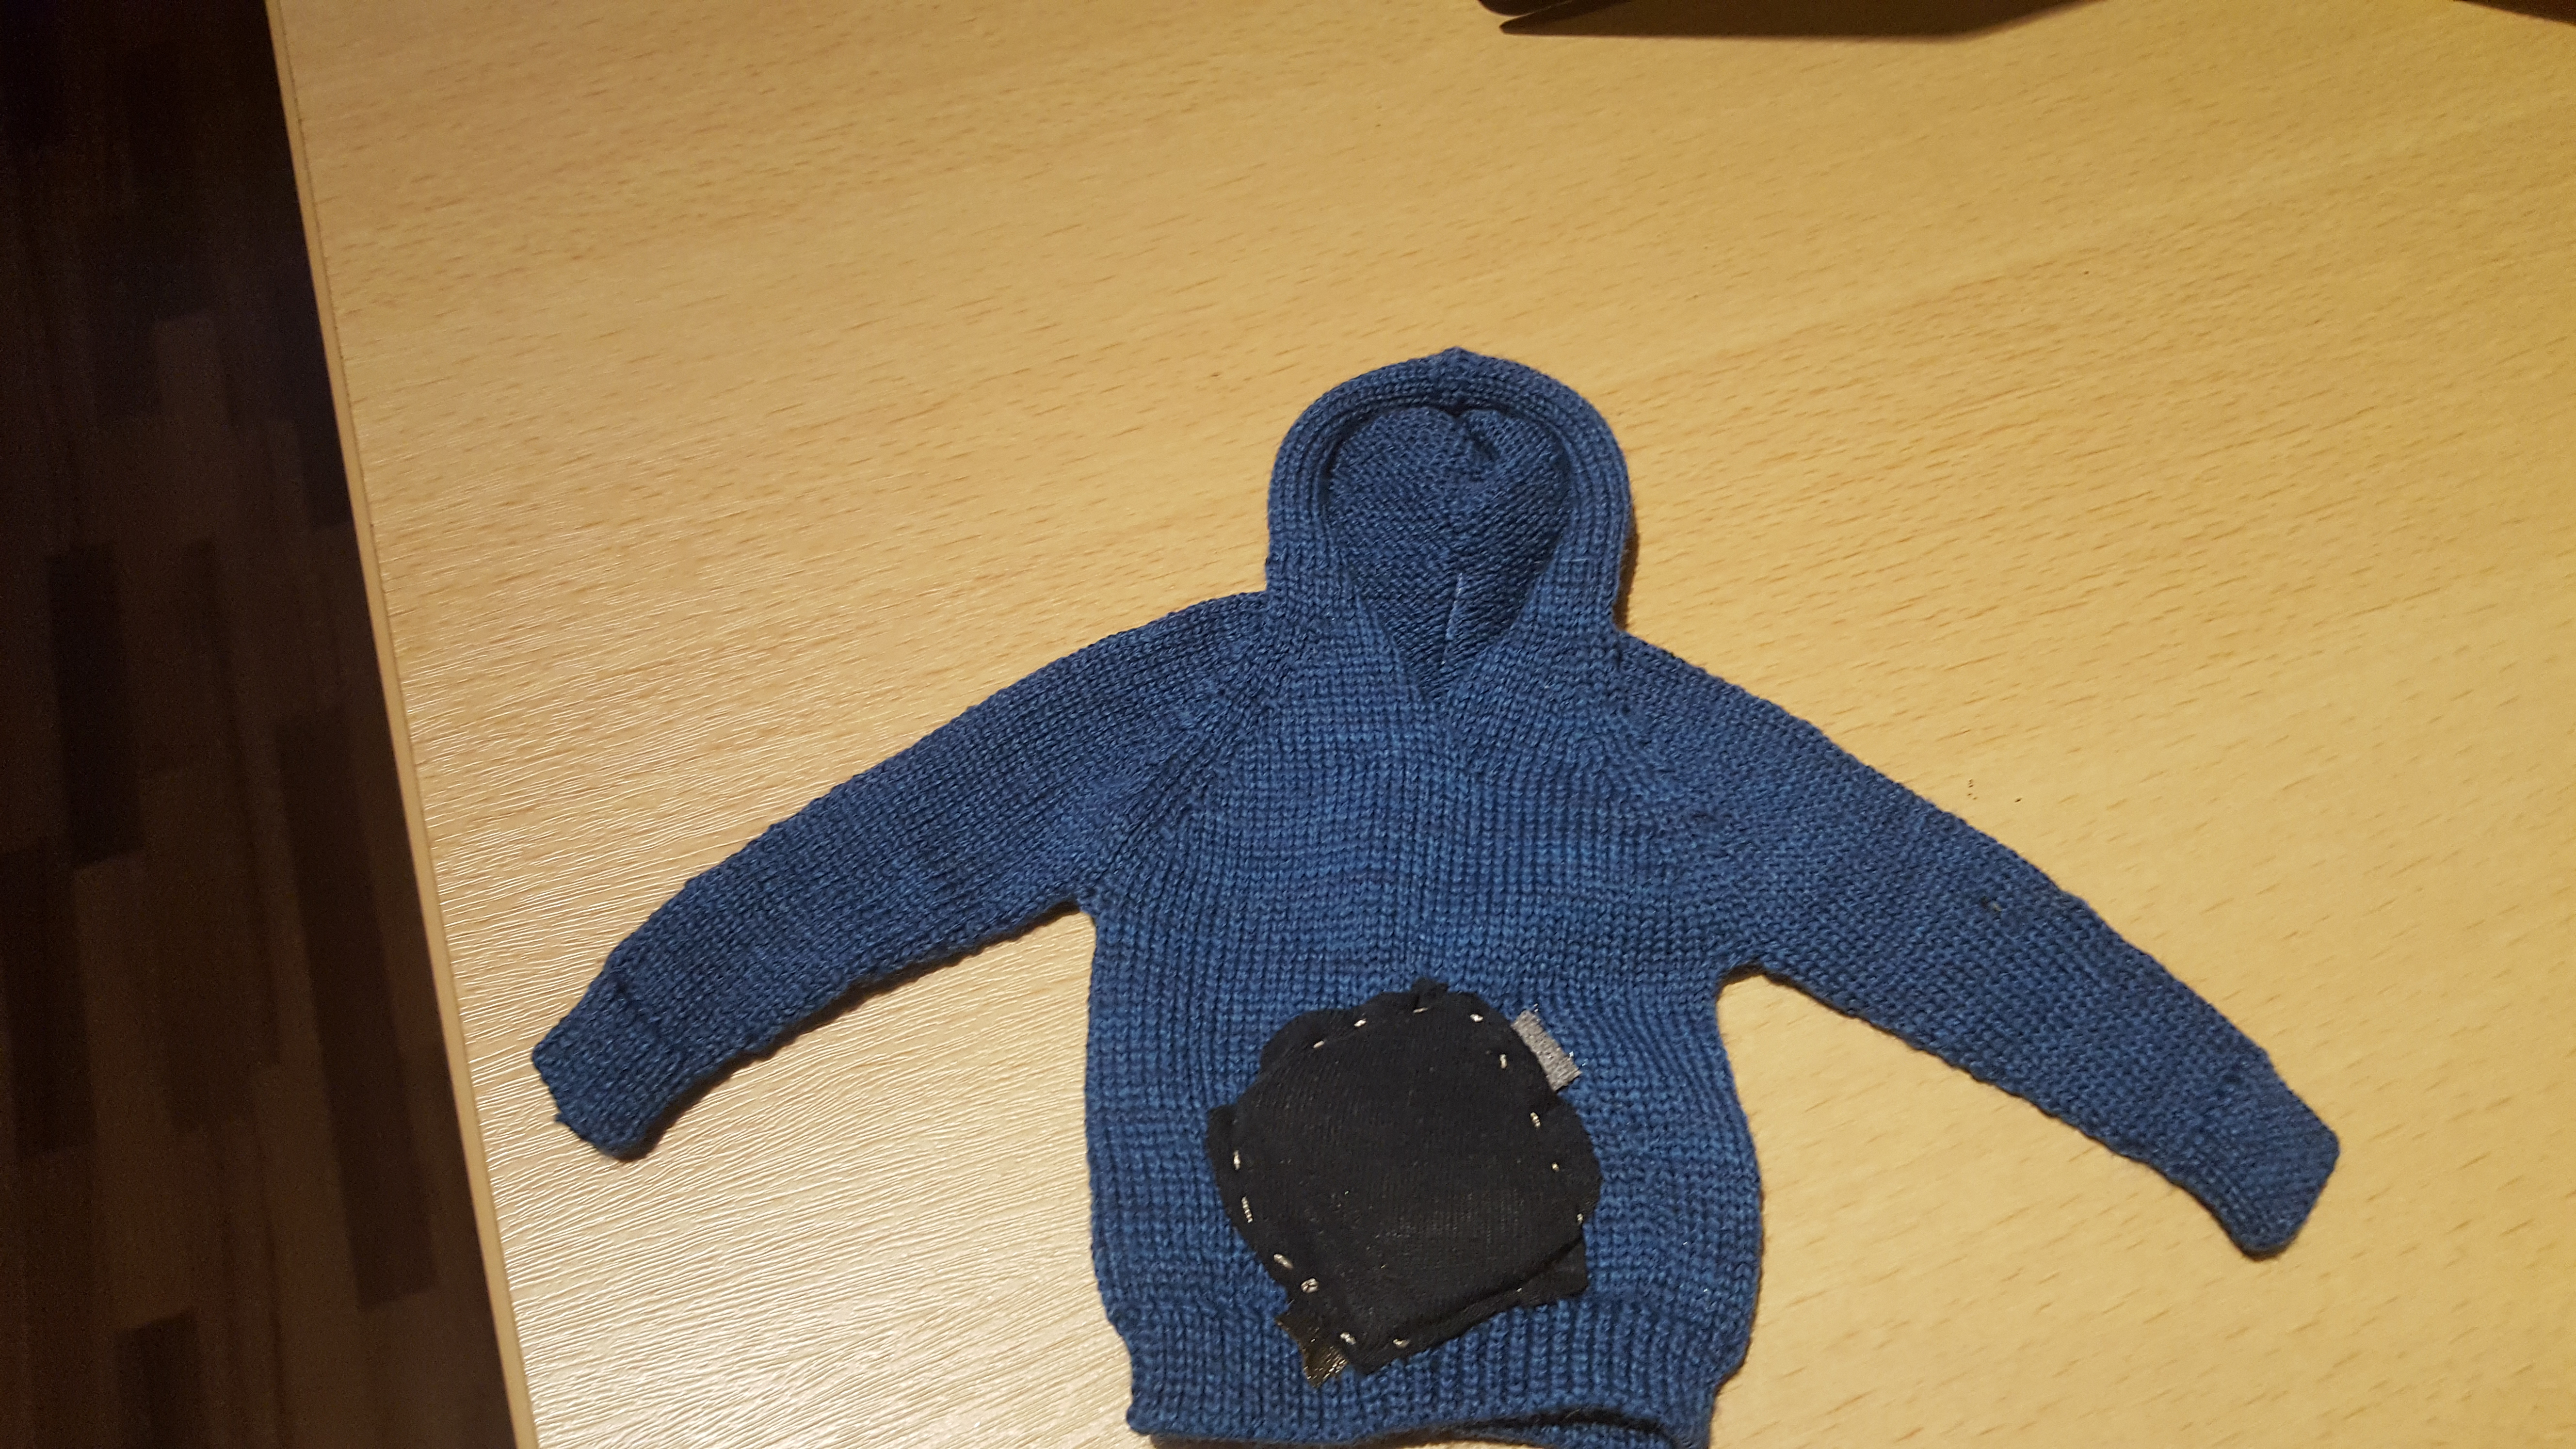
Our group of Fabrication for Care has the opportunity to make a simple pressure sensor inside the material by choice.This sensor which we make before in my documentation I use it for one of my materials.I use the conductive thread and I put the sensor on the material and spun it with other material on the top.This will be helpful for our final project,for example I have an idea for the project to make an compressive socks with sensor helping the circulation of the blood.After,making this sensor we could also make an stripe with the conductive thread and connect the resistor and LED to it.In addition,like it is shown in the picture it is really important to left the conductive material as it was describe after that in the documentation with both sides open that it will be possible to connect into the electronic workbench.
In the picture below,I use my pattern to see how the DIY sensors can be done and they work.I sew the sensor inside the pattern and then I cover it with non-conducted material,using a normal thread.The only pint was that I had to left the to cutted ends of the conductive material which I use before,in order that I can connect them with the klips electronically,and after that to extend it with conductive thread for other purposes.
Electonic workbench
It is really important at first to set up your workbench properly before to start making something.The storage and keep everything organized for every electronic component is a really good idea.In addition,that you have a good workspace set up, it’s time to stock it with the proper tools and equipment. This isn’t a complete list but it does highlight the most common items used in electronics.Breadboards are an essential tool for prototyping and building temporary circuits. These boards contain holes for inserting wire and components. Because of their temporary nature, they allow you to create circuits without soldering. The holes in a breadboard are connected in rows both horizontally and vertically.As are included also the triggers which contains of imput and output.Digital Multimeter is a device that’s used to measure electric current (amps), voltage (volts) and resistance(ohms). It’s a great for troubleshooting circuits and is capable of measuring both AC and DC voltage.Test Leads are great for connecting components together to test a circuit without the need for soldering.Jumper Wire are used with breadboard and development boards and are generally 22-28 AWG solid core wire. Jumper wires can have male or female ends depending on how they need to be used.Resistors are used to resist the flow of current or to control the voltage in a circuit. The amount of resistance that a resistor offers is measured in Ohms. Most resistors have colored stripes on the outside and this code will tell you it’s value of resistance. You can use a multimeter or Digikey’s resistor color code calculator to determine the value of a resistor.Capacitors store electricity and then discharges it back into the circuit when there is a drop in voltage. A capacitor is like a rechargeable battery and can be charged and then discharged. The value is measured in F (Farad), nano Farad (nF) or pico Farad (pF) range.Light-Emitting Diode (LED)is like a standard diode in the fact that electrical current only flows in one direction. The main difference is an LED will emit light when electricity flows through it. Inside an LED there is an anode and cathode. Current always flows from the anode (+) to the cathode (-) and never in the opposite direction. The longer leg of the LED is the positive (anode) side.Conductivity is the measure of the ease at which an electric charge or heat can pass through a material. A conductor is a material which gives very little resistance to the flow of an electric current or thermal energy. Materials are classified as metals, semiconductors, and insulators. Metals are the most conductive and insulators (ceramics, wood, plastics) the least conductive.Voltage is the pressure from an electrical circuit's power source that pushes charged electrons (current) through a conducting loop, enabling them to do work such as illuminating a light. In brief, voltage = pressure, and it is measured in volts (V).Resistance is a measure of the opposition to current flow in an electrical circuit.Resistance is measured in ohms, symbolized by the Greek letter omega (Ω).All materials resist current flow to some degree. They fall into one of two broad categories:
Conductors: Materials that offer very little resistance where electrons can move easily. Examples: silver, copper, gold and aluminum.
Insulators: Materials that present high resistance and restrict the flow of electrons. Examples: Rubber, paper, glass, wood and plastic.Resistance measurements are normally taken to indicate the condition of a component or a circuit.
The higher the resistance, the lower the current flow. If abnormally high, one possible cause (among many) could be damaged conductors due to burning or corrosion. All conductors give off some degree of heat, so overheating is an issue often associated with resistance.
The lower the resistance, the higher the current flow. Possible causes: insulators damaged by moisture or overheating.
CapasitorsA capacitor is a passive two-terminal electronic component that stores electrical energy in an electric field. The effect of a capacitor is known as capacitance. While some capacitance exists between any two electrical conductors in proximity in a circuit, a capacitor is a component designed to add capacitance to a circuit. The capacitor was originally known as a condenser or condensator.Series Circuits are two components in series if they share a common node and if the same current flows through them.Parallel Circuits,If components share two common nodes, they are in parallel.
source:https://www.makerspaces.com/basic-electronics/
source:https://www.lehigh.edu/~amb4/wbi/kwardlow/conductivity.htm
source:https://www.fluke.com/en/learn/best-practices/measurement-basics/electricity/what-is-resistance
source:https://en.wikipedia.org/wiki/Capacitor
DIY Sensors/Wearable Project

Our group of Fabrication for Care had the opportunity to get familiar with the do-it-yourself(DIY Sensors) and simultaneosly to learn how to make wearable projects and to prepare it for the final project,using the Arduino program.Here is the process of making an pressure sensor:
Process steps
- Step 1:
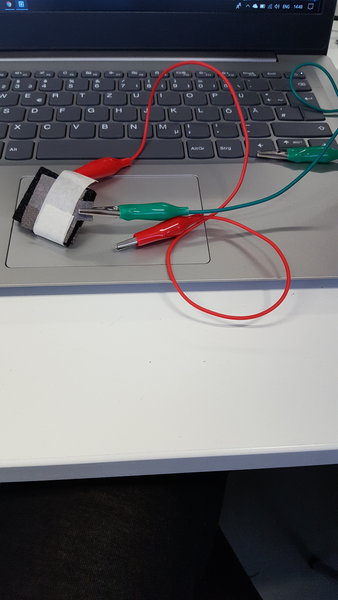
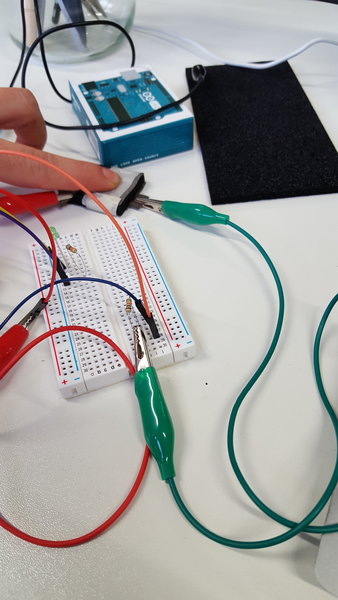
We prepare our workbench with all necessary electronic components.After that we choose our material for the pressure sensor,which is consist of two parts.The first is textile and fabric with two sides.The one side is glossy.Then we cut it in the way that they will not touch each other and then we can attached the electronic clips on it and the glossy part should be on the textile covered on the inside part and finally we stich is with tape,to hold it.
- Step 2:
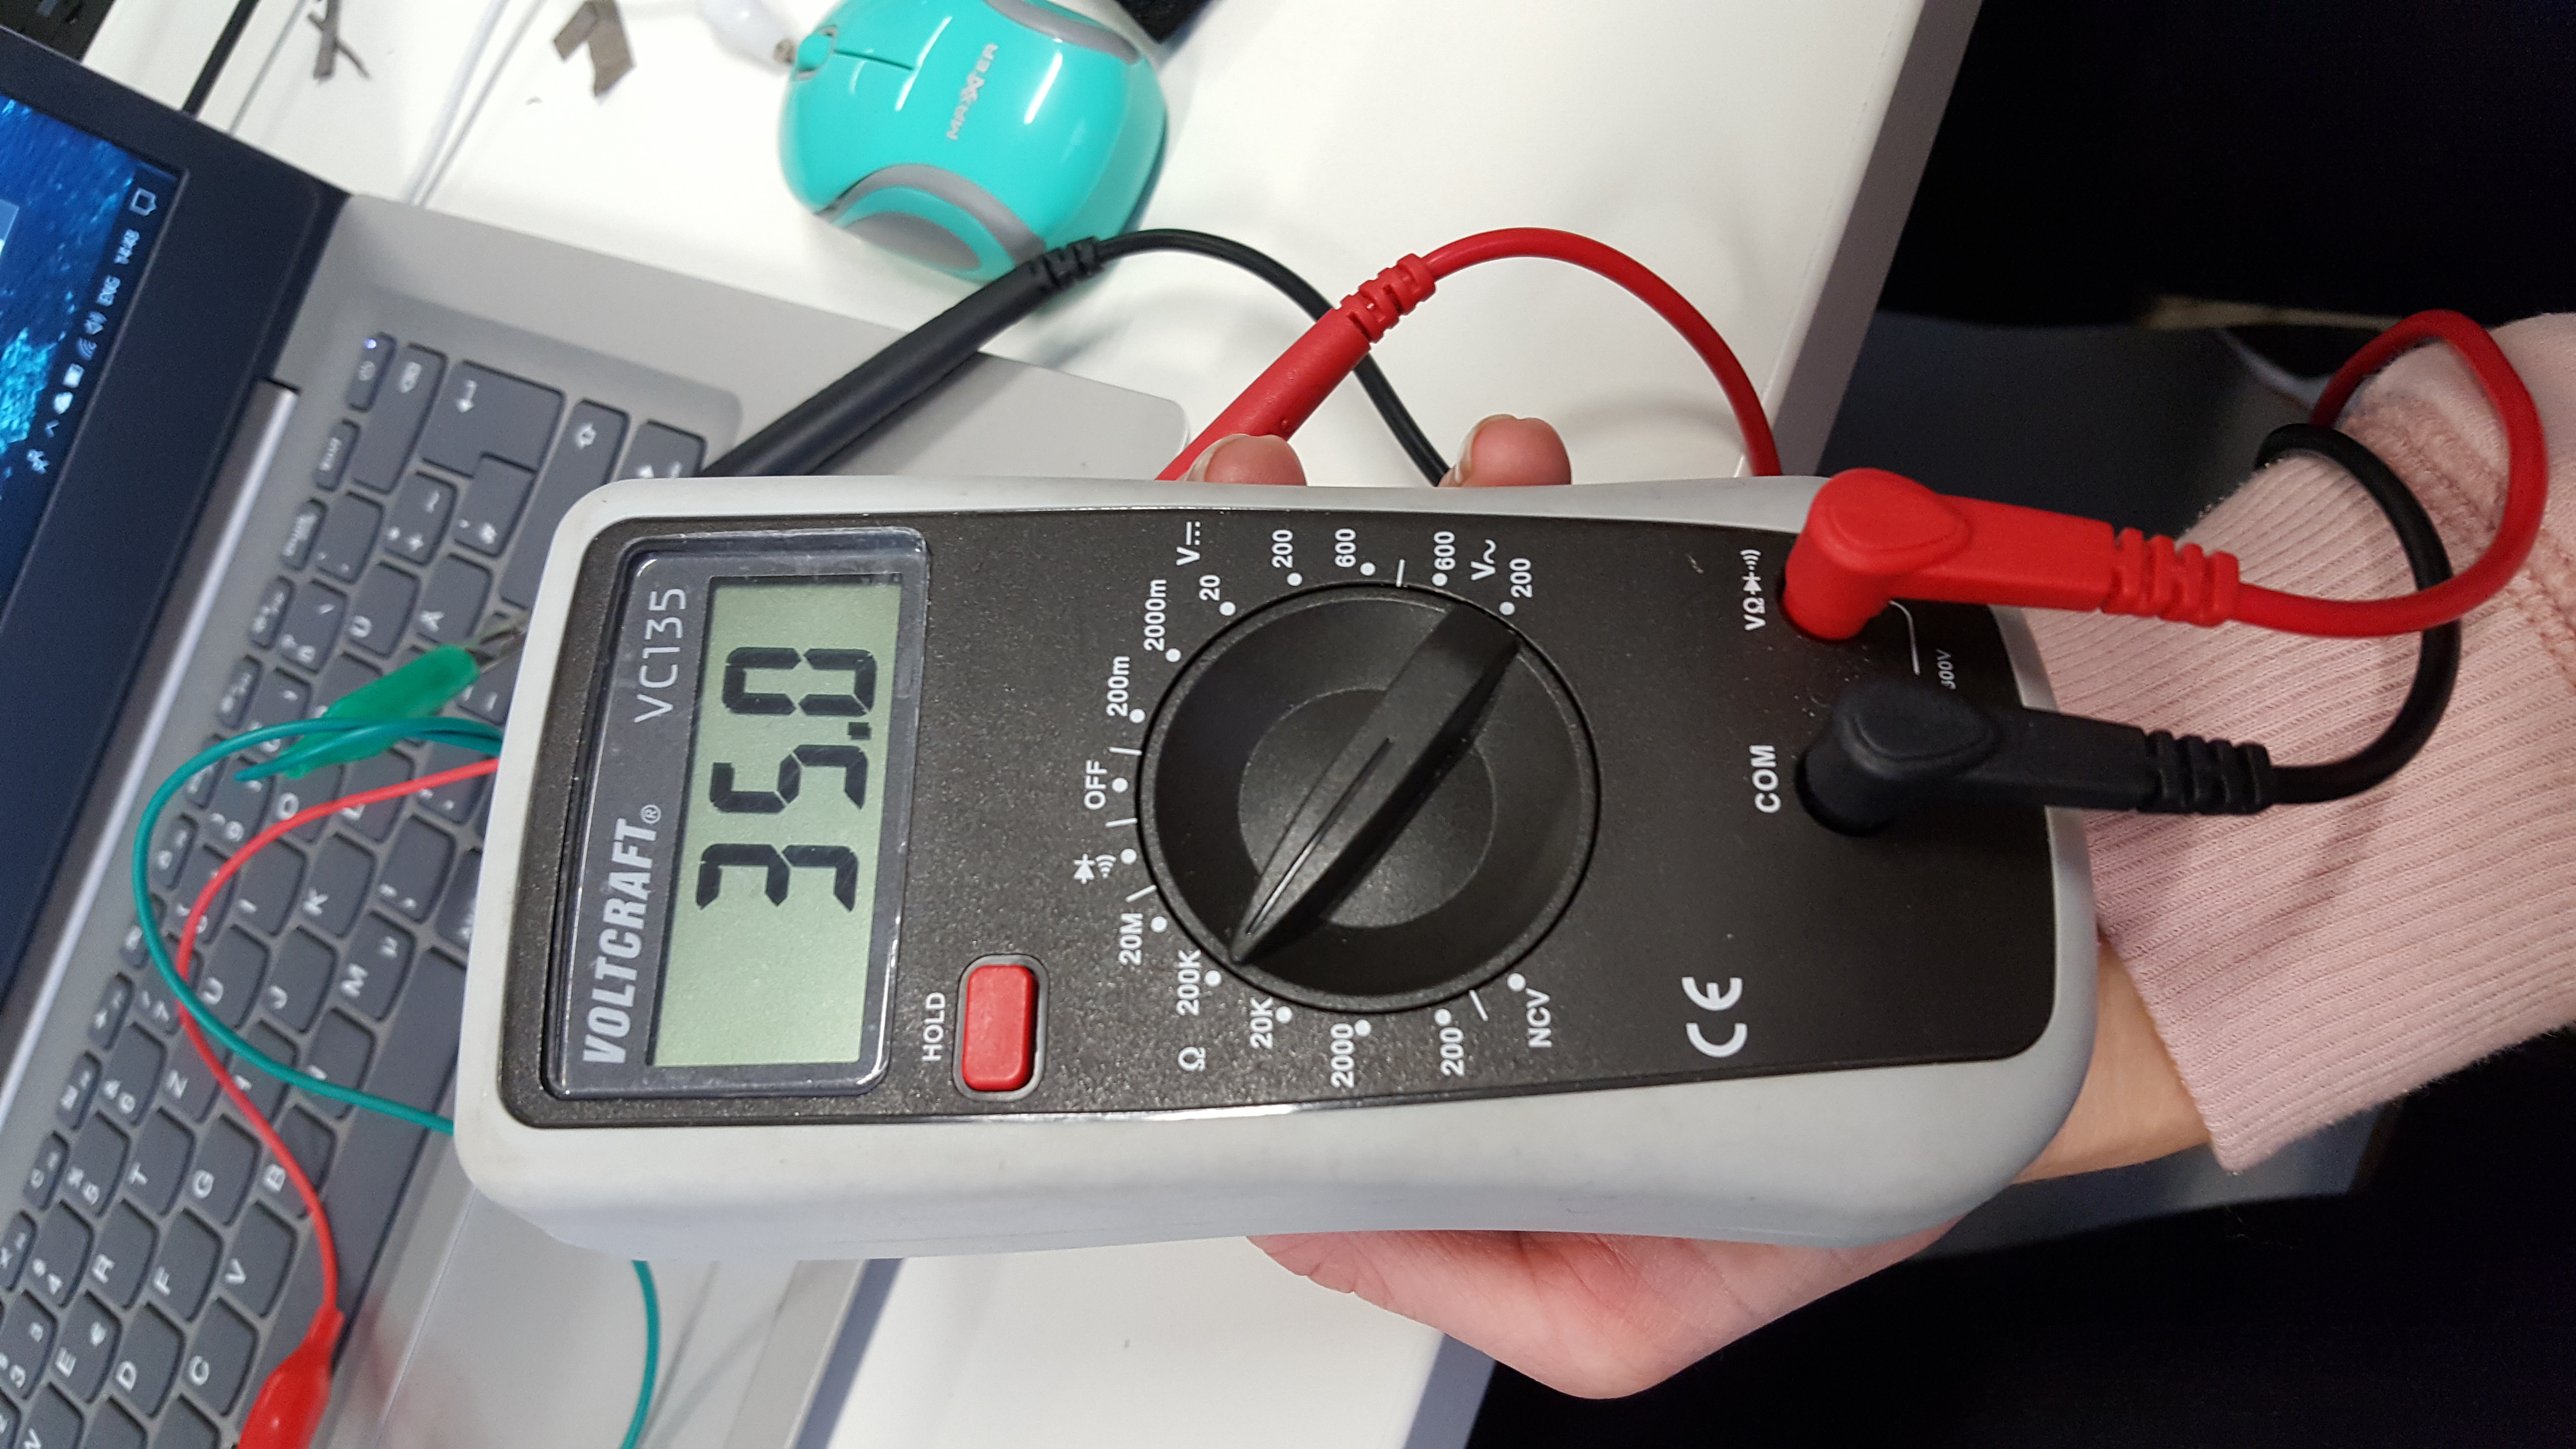
The second step is consist of using the multimieter we choose our resistance connectivity in this case mine was 14 Kilo Ohms,but it is changing the value all the time.
- Step 3:
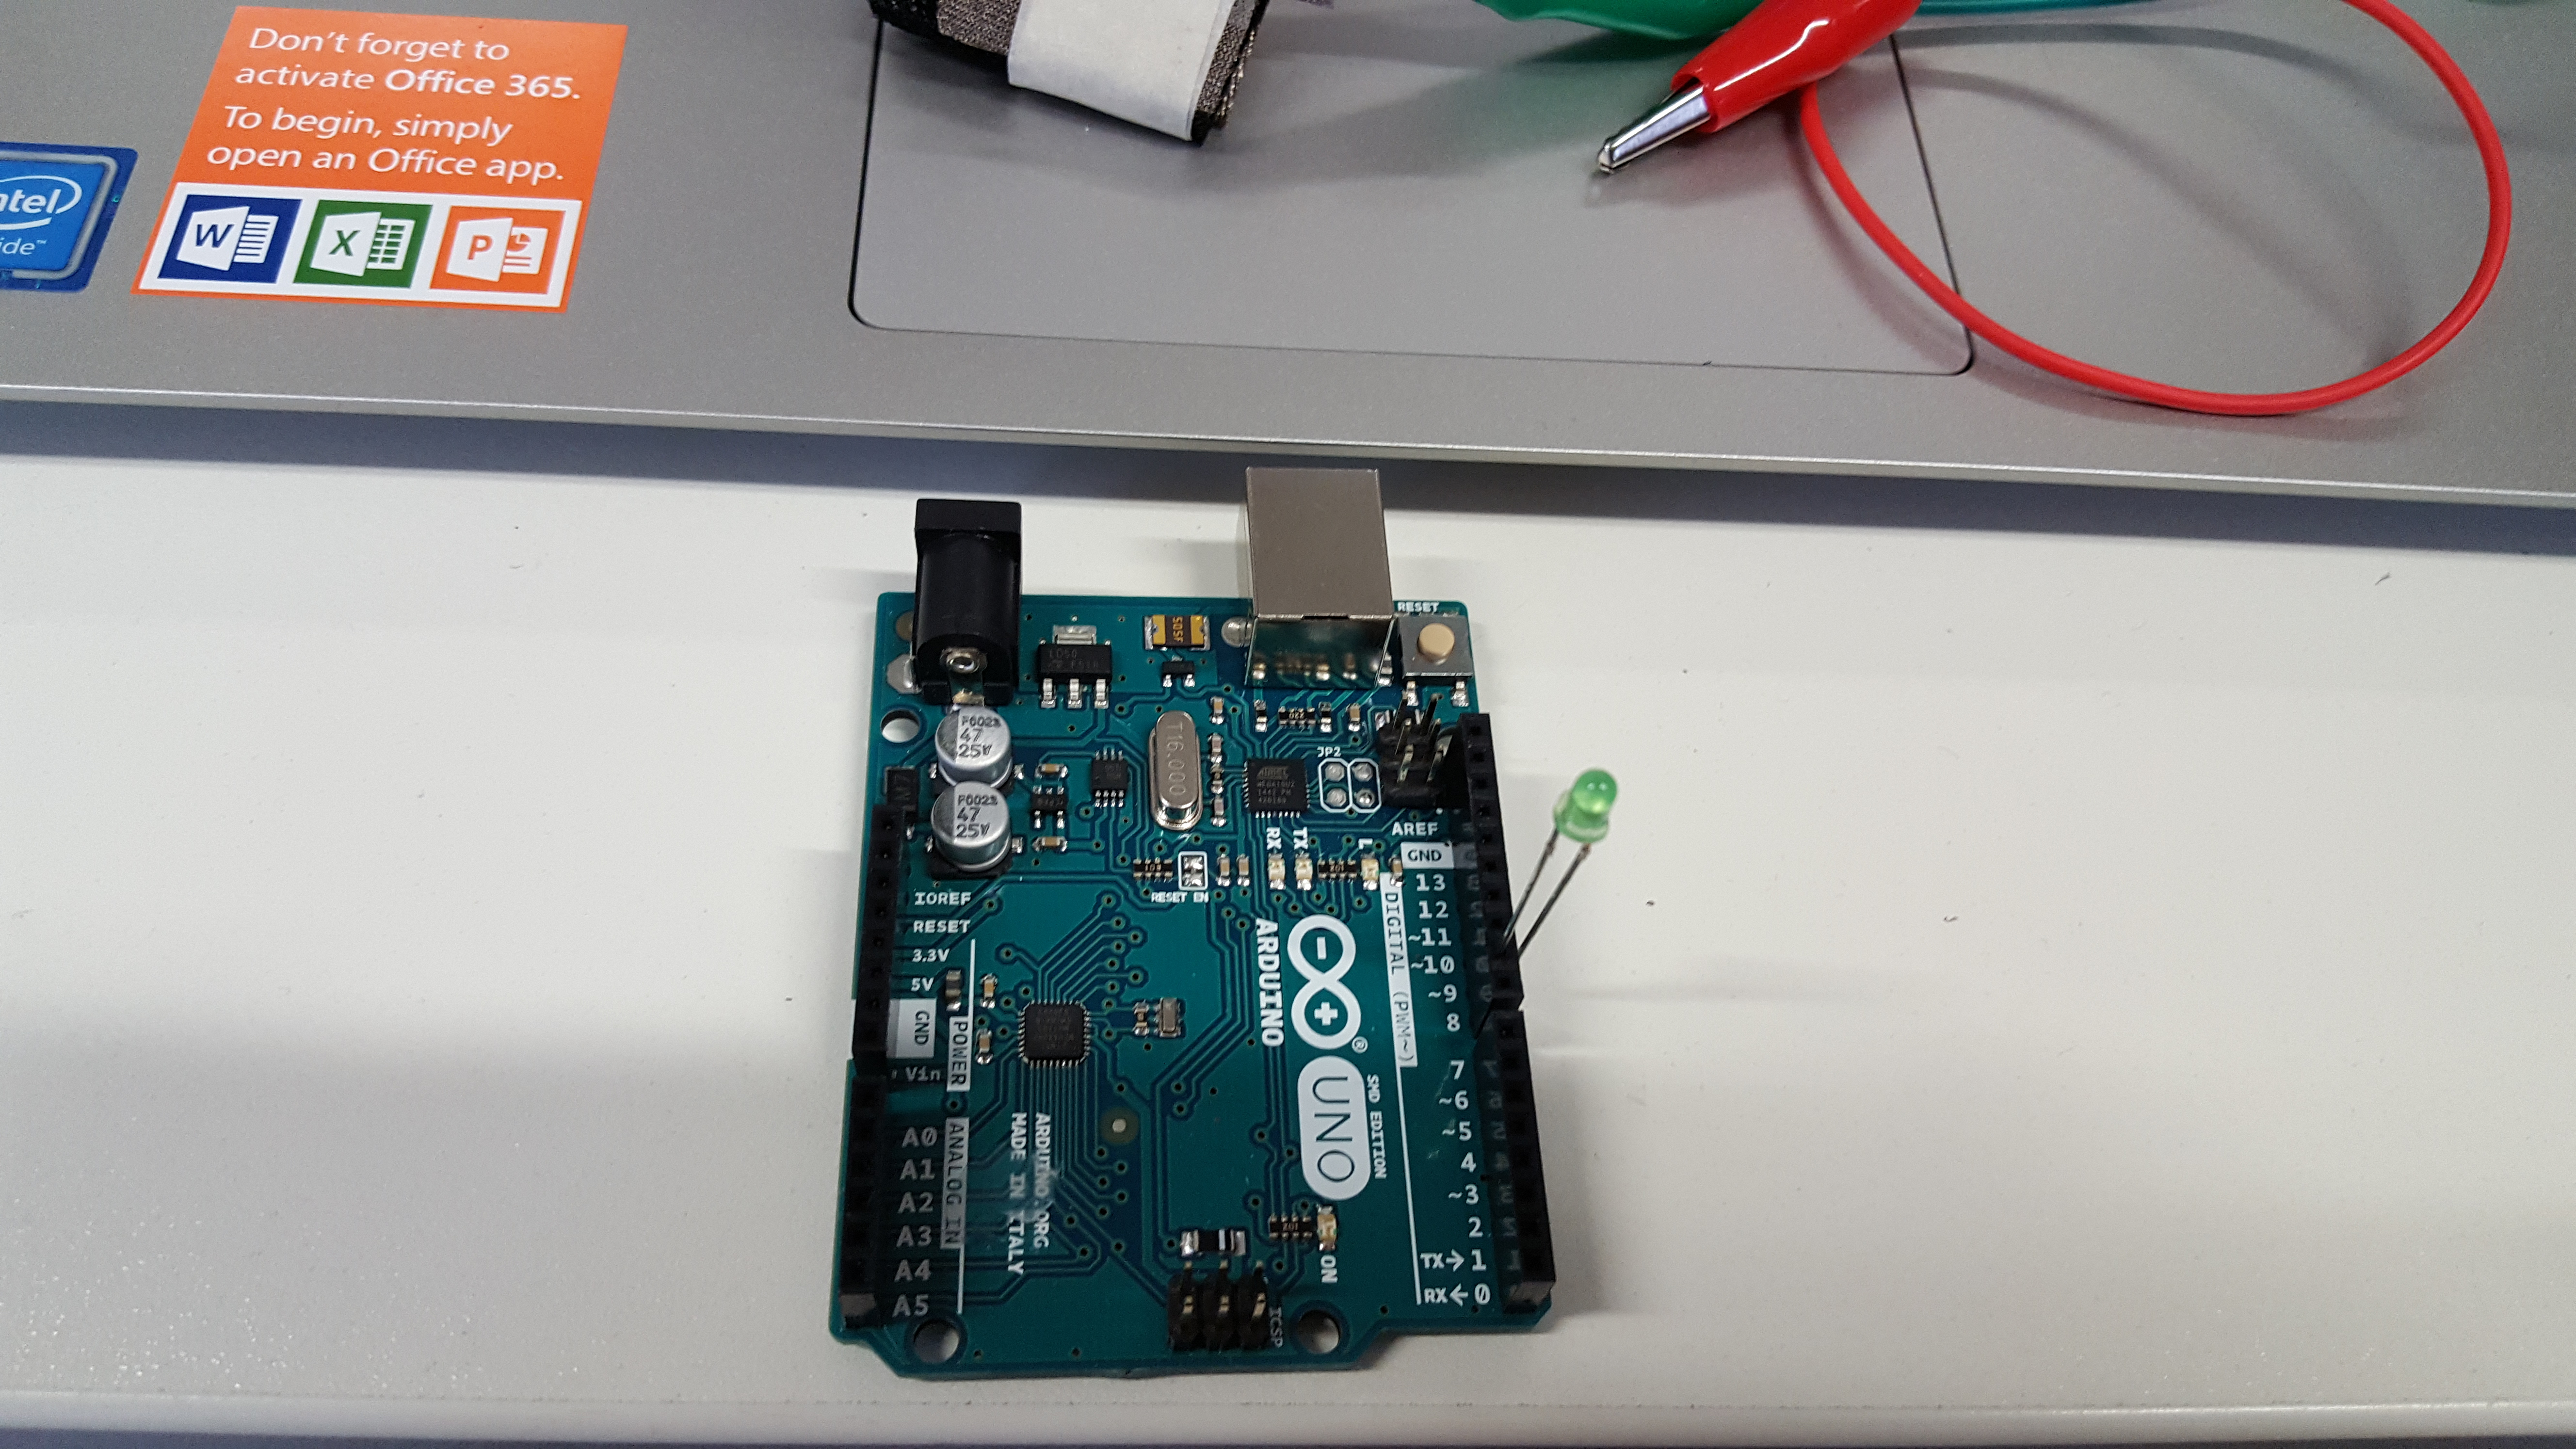
Meanwhile,we connect the LED in the board in number 9 with plus inside and
GND ground always minus,longer leg in LED is positive one.
- Step 4:
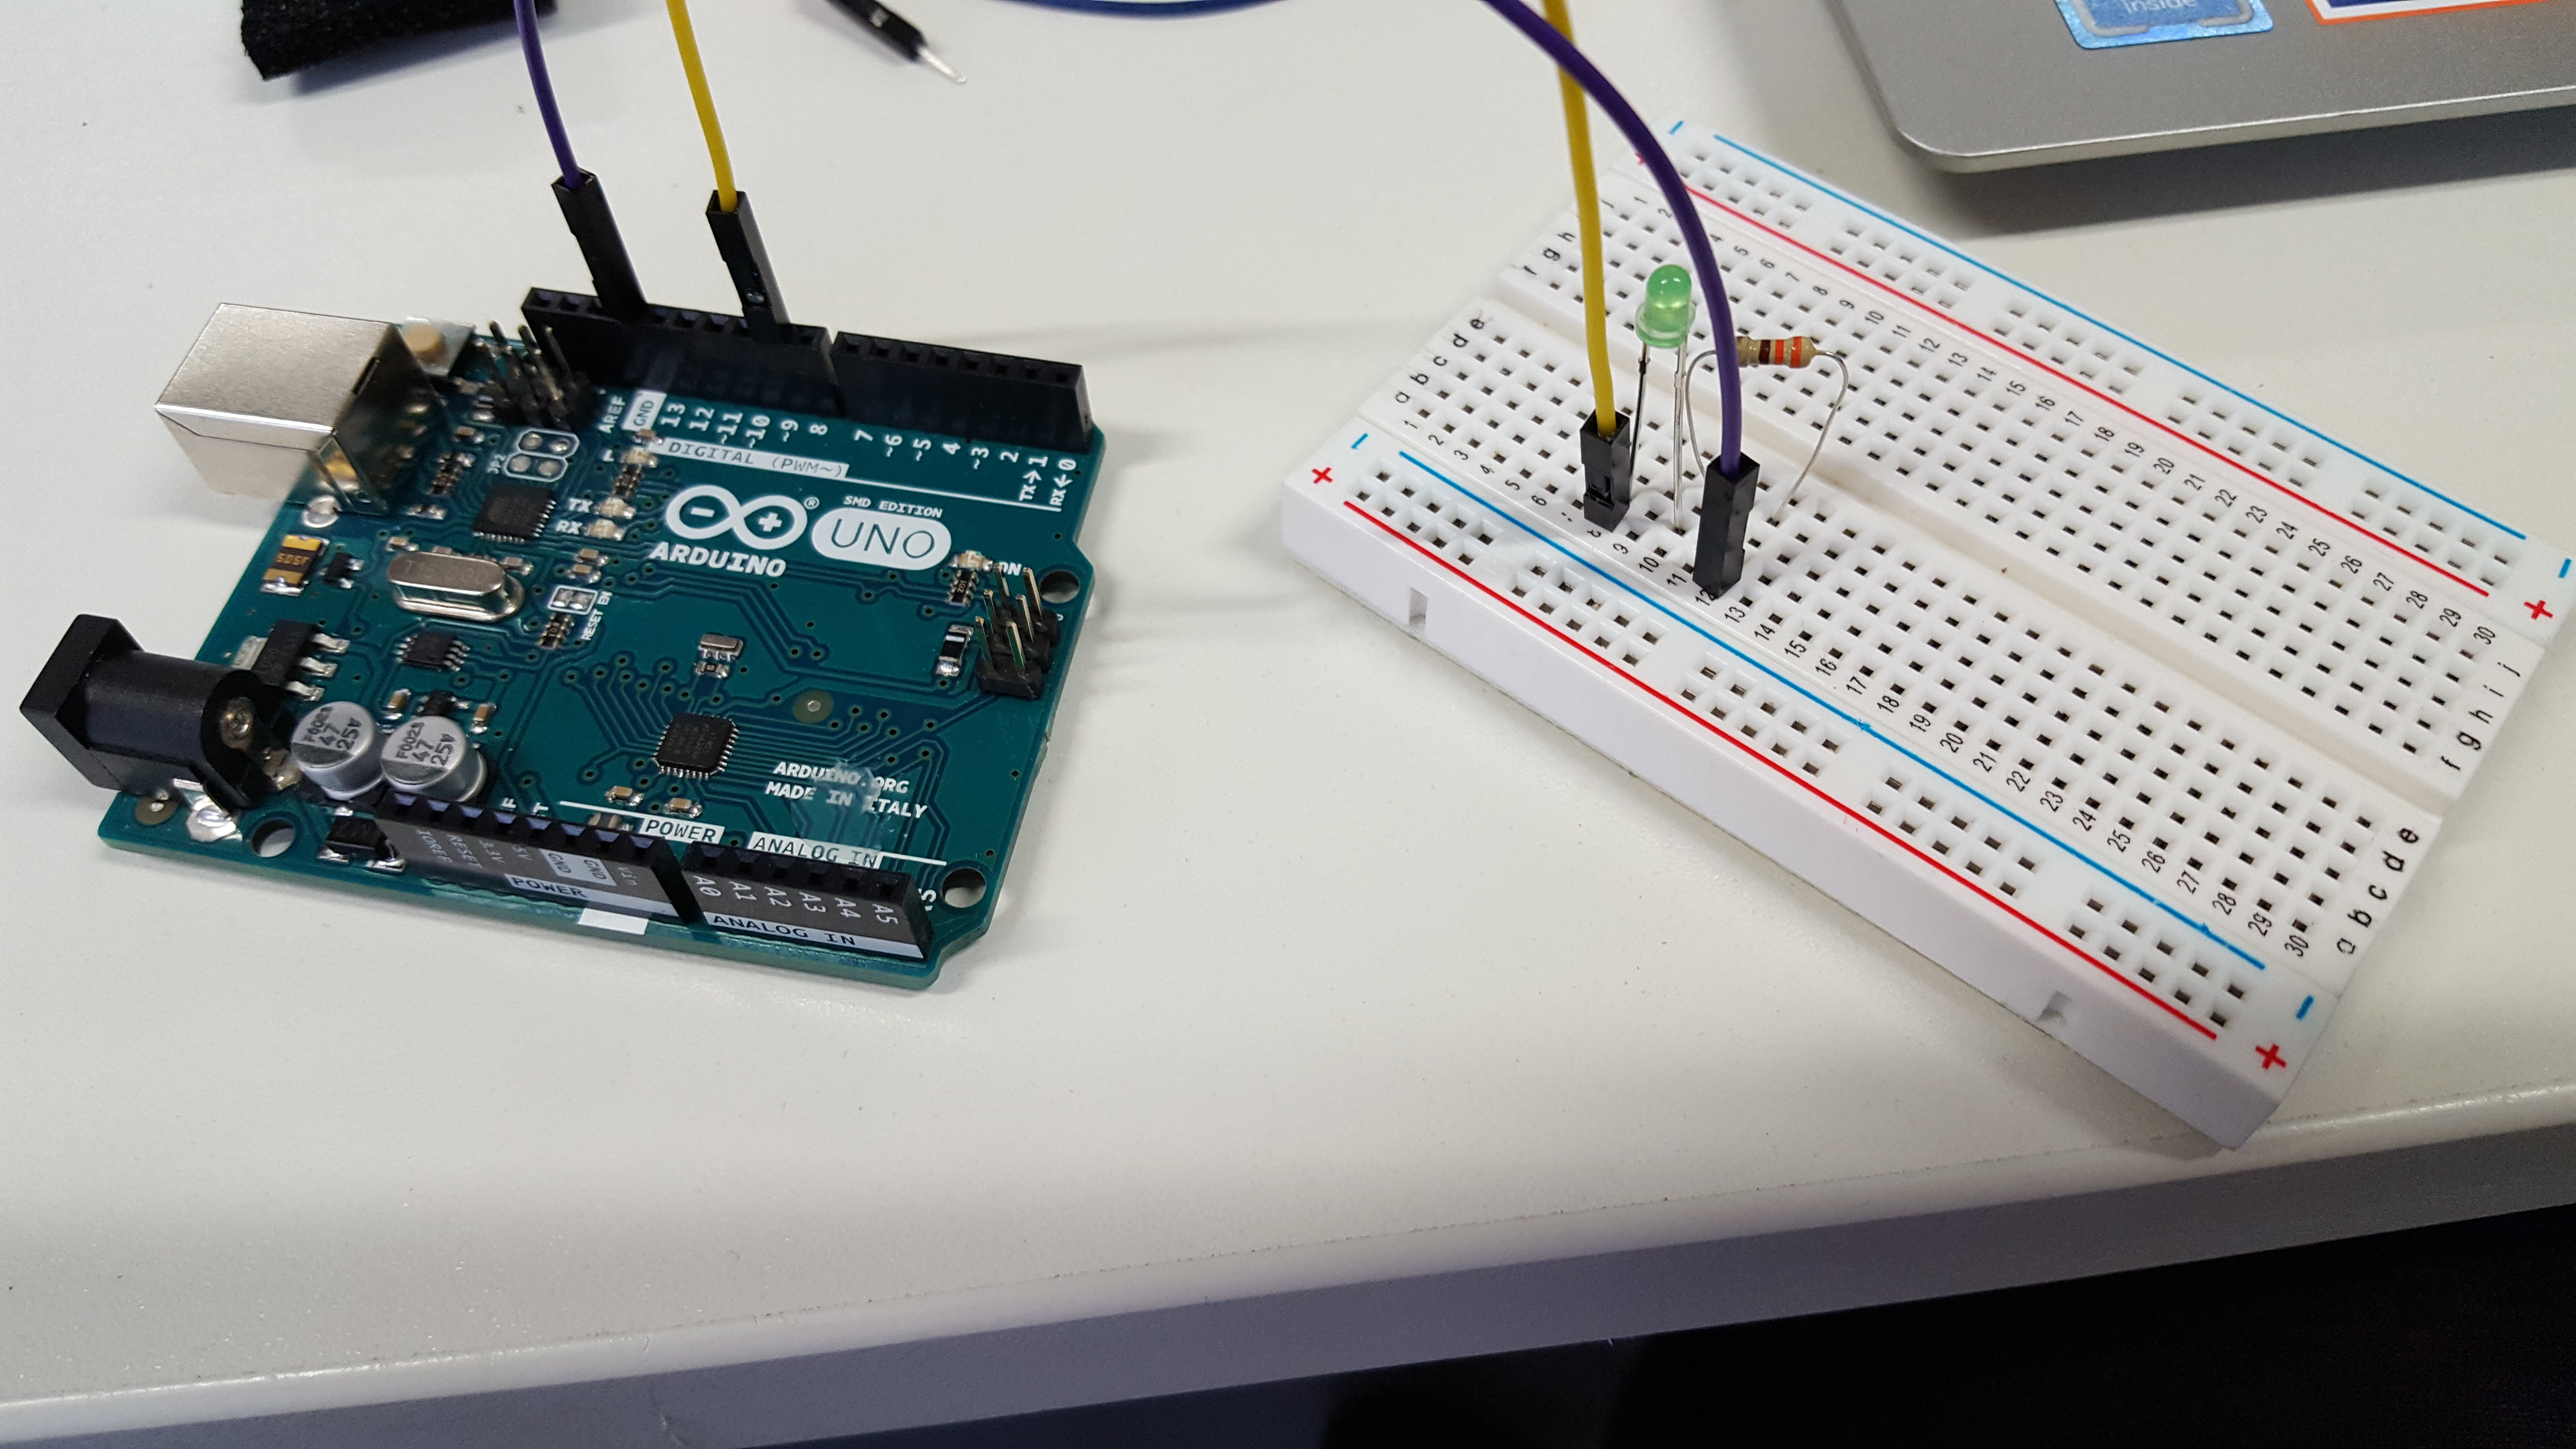
After that is the turn of choosing a resistor.This we choose using the unit of resistance connectivity to be closer to the number,in my case it was 200 ohms which is equal to 10 K and plus 4,7K is closer to 14.
- Step 5:
We connect one cable to the Ground GND in the board arduino and the other part in the white board.Then we connect other cable with power 9 and the other part to the white board.Then we put the LED and the resistor in the white board and make them in series.After that we put another resistor 4.7 k in the white board ,then we add one more two more cables ,one in the 5V arduino board klips and the other cable in the arduino board in GND ground and next to the resistor and other klips in the resistor ,then we use another cable in A0 in the arduino board and the next to the white board next to the other.
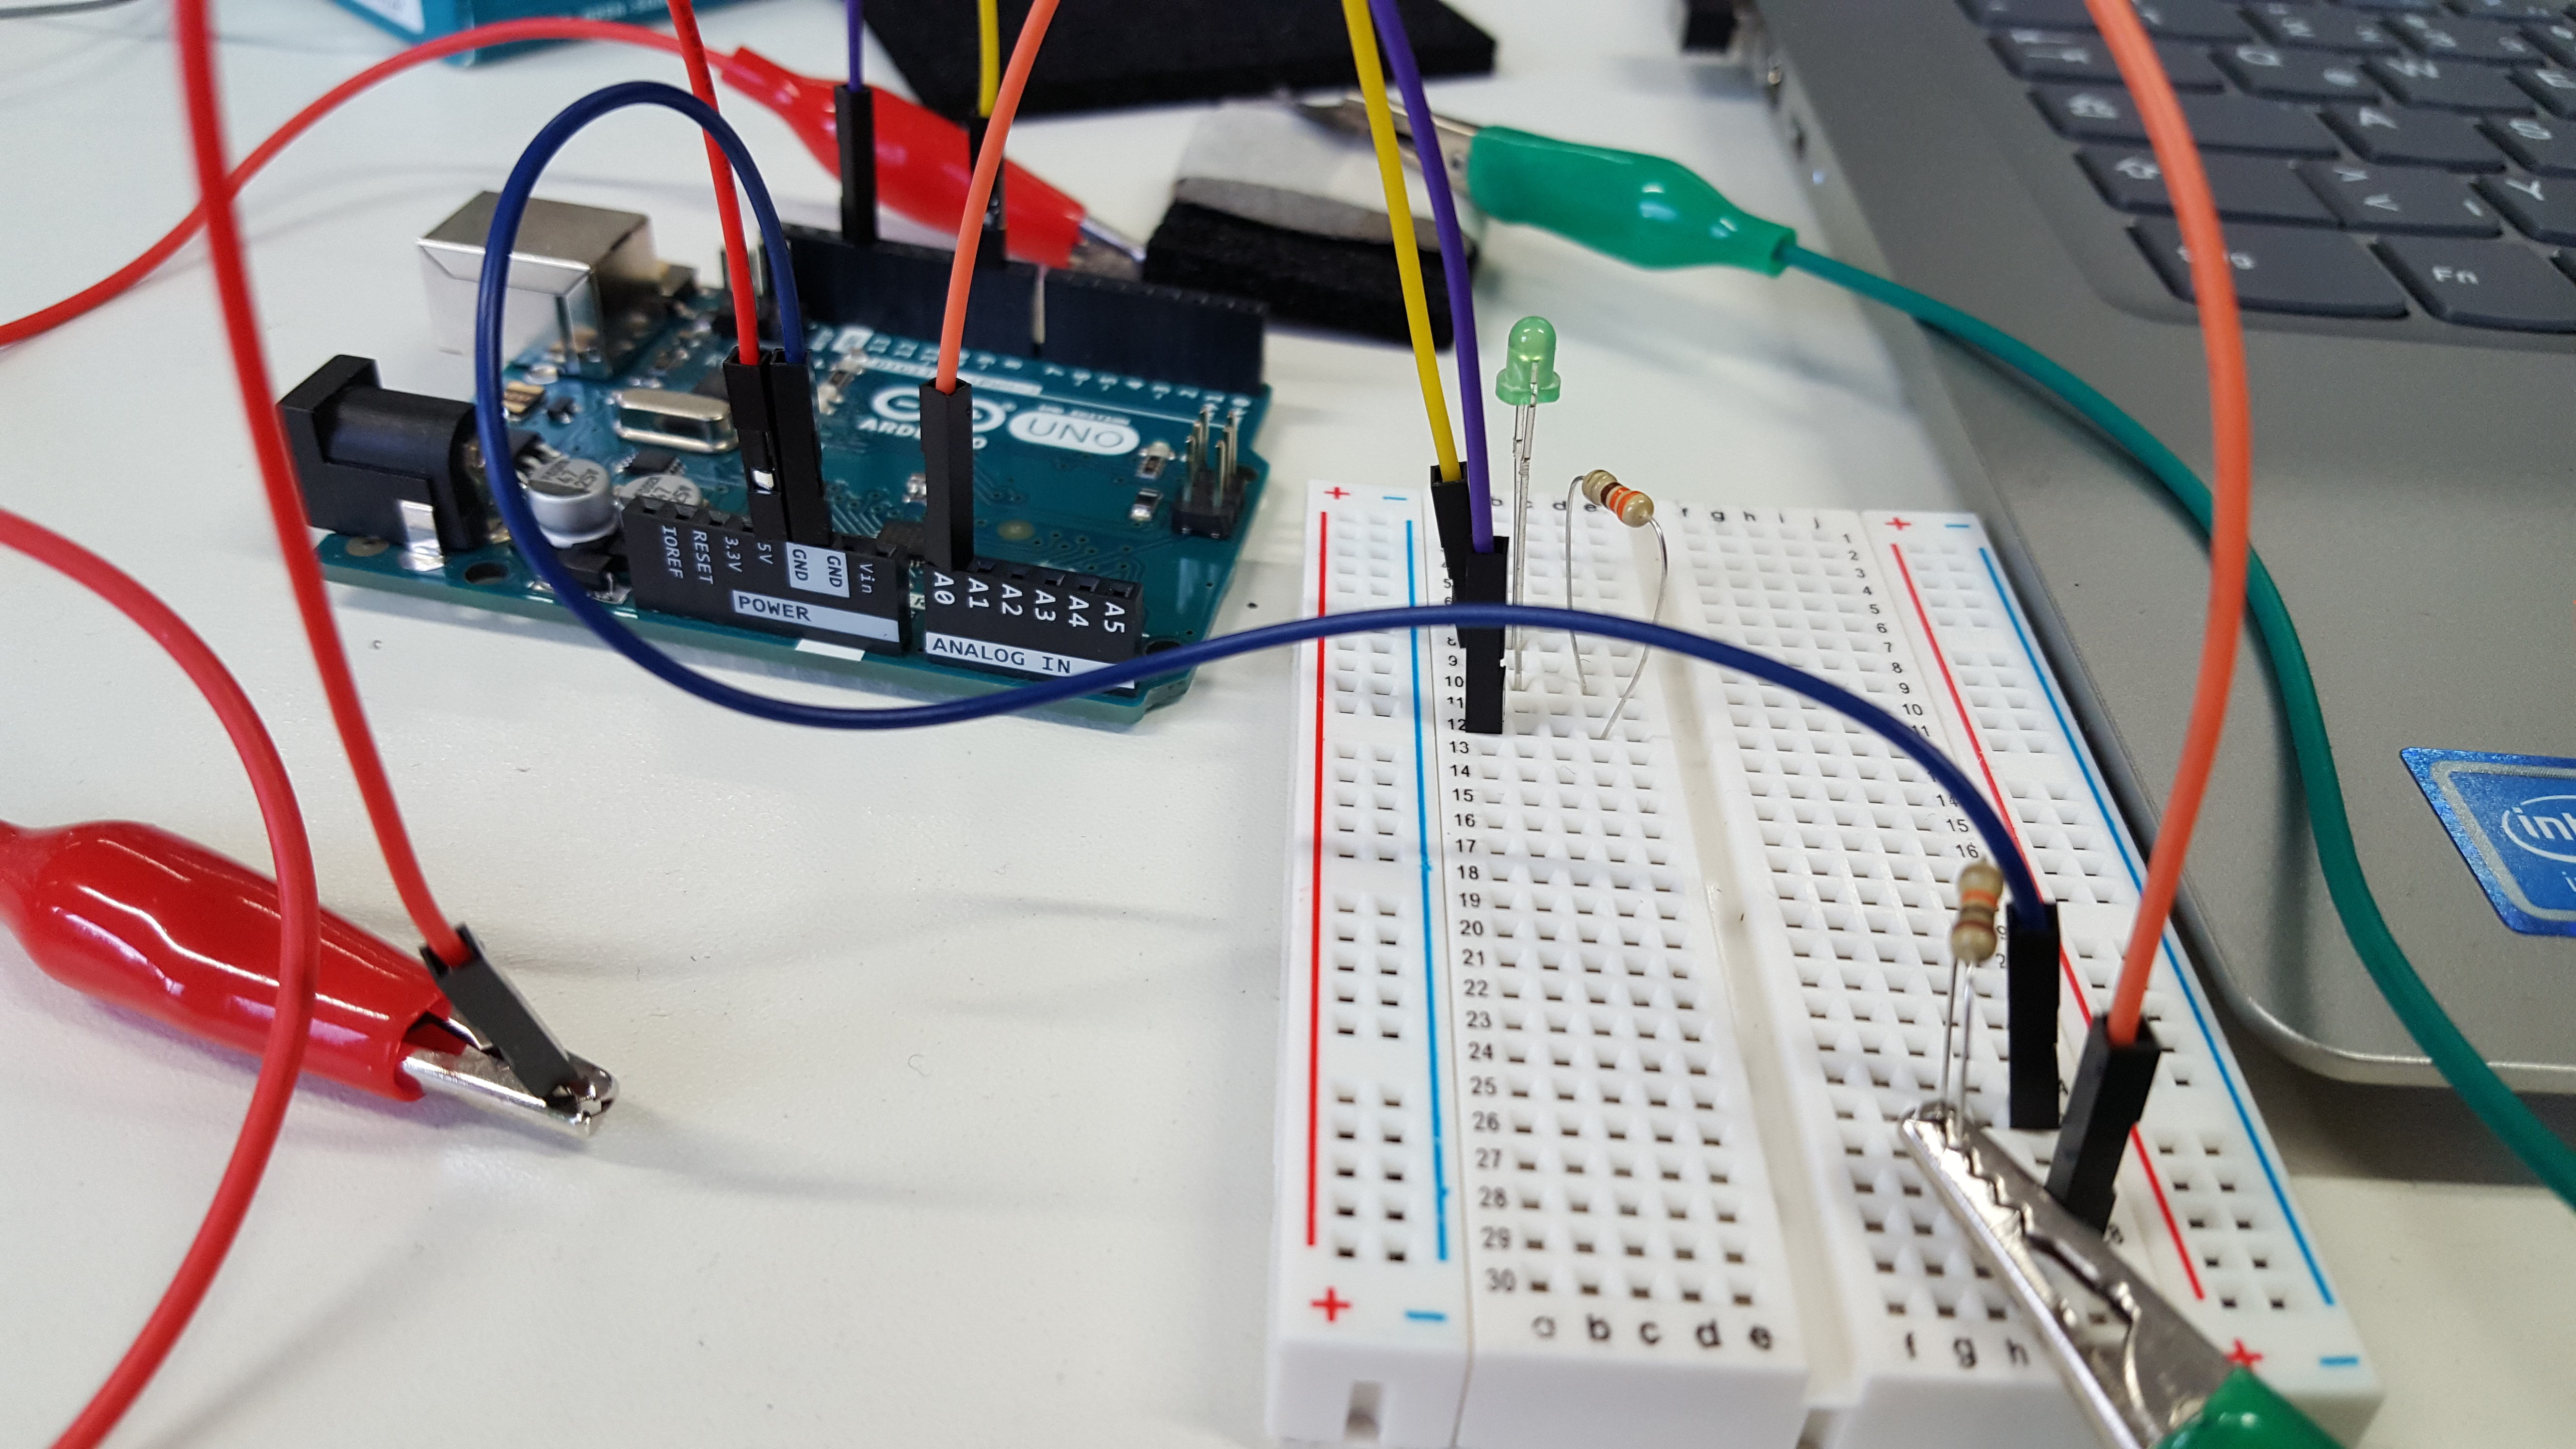
- Step 6:
Finally,we connect the prepared pressure sensor to the computer using the program Arduino,and we see that pressing it the value of the units is getting higher and after rlease it it change the numbers constantly.
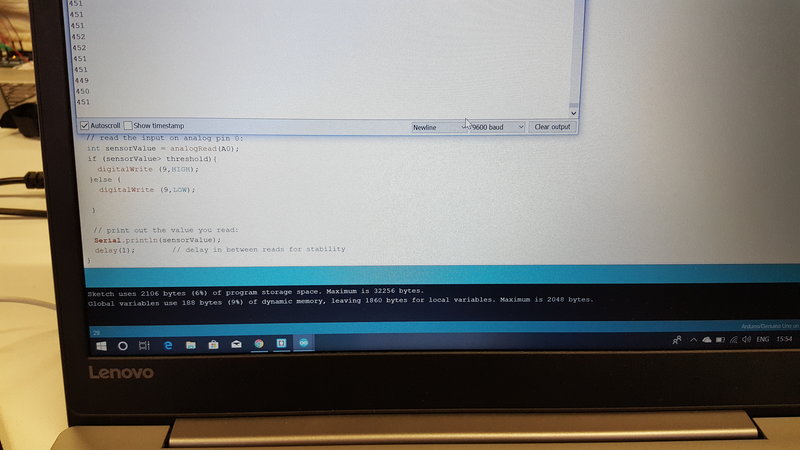
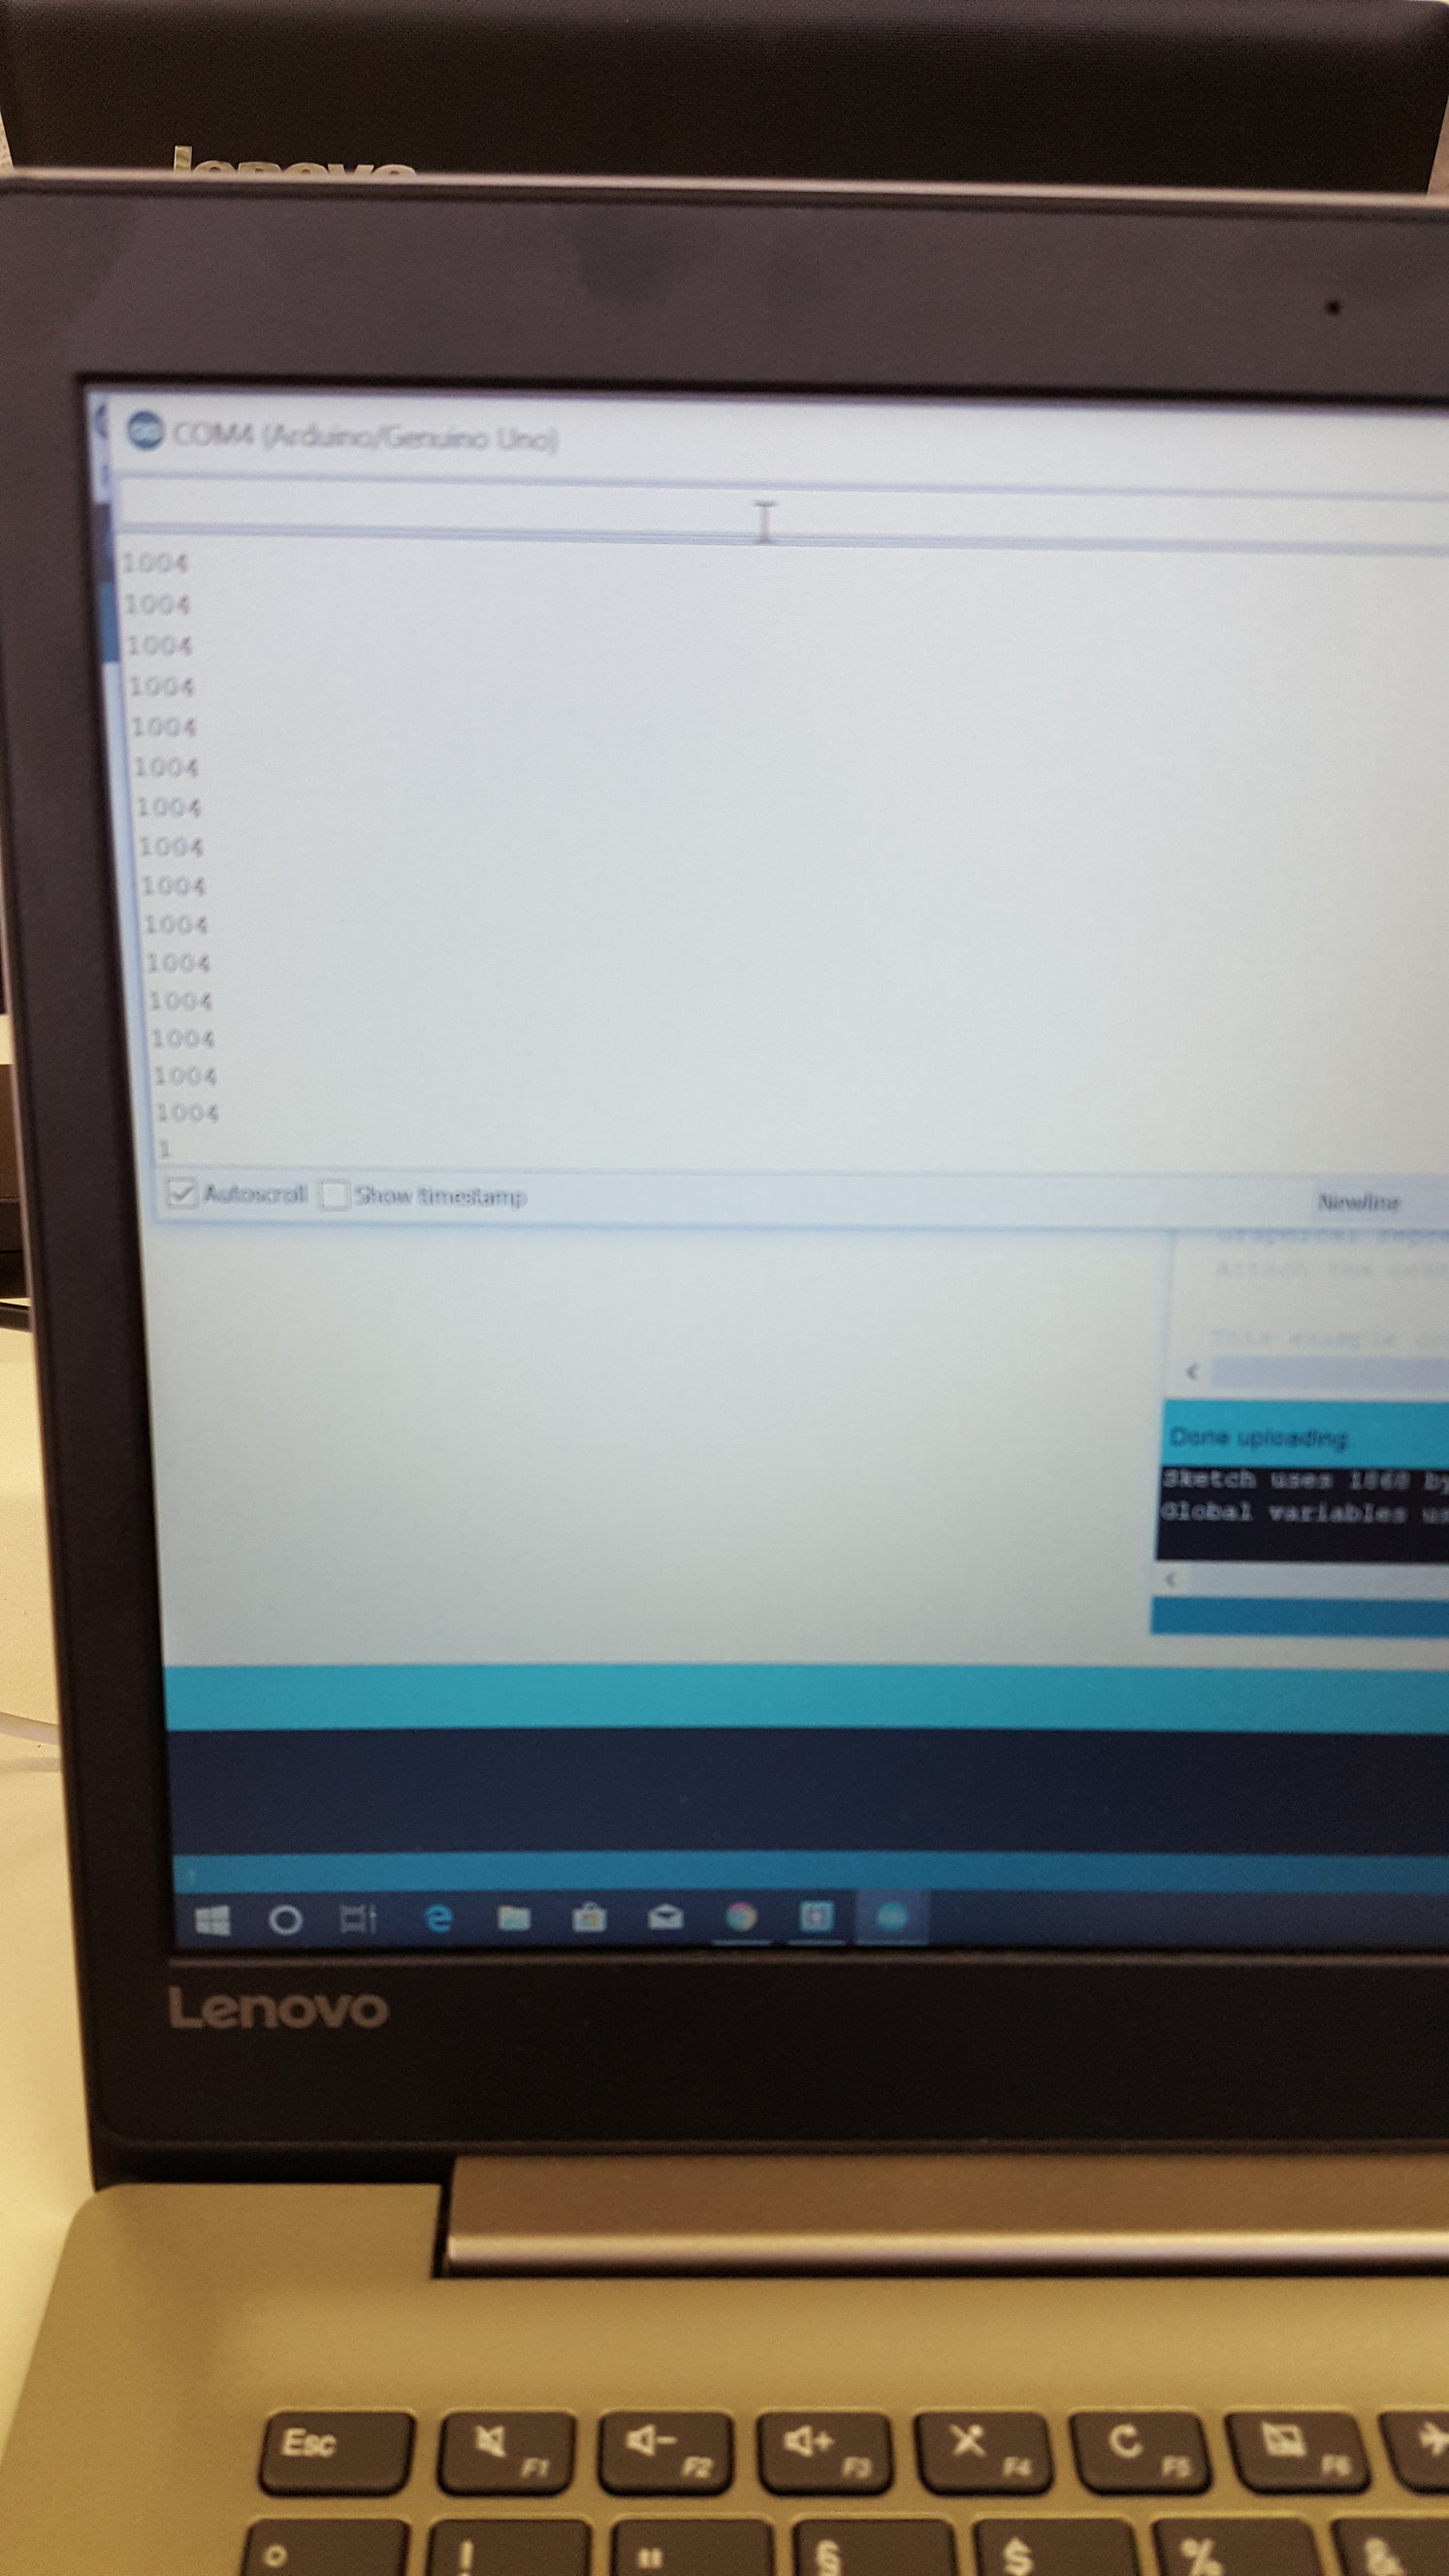
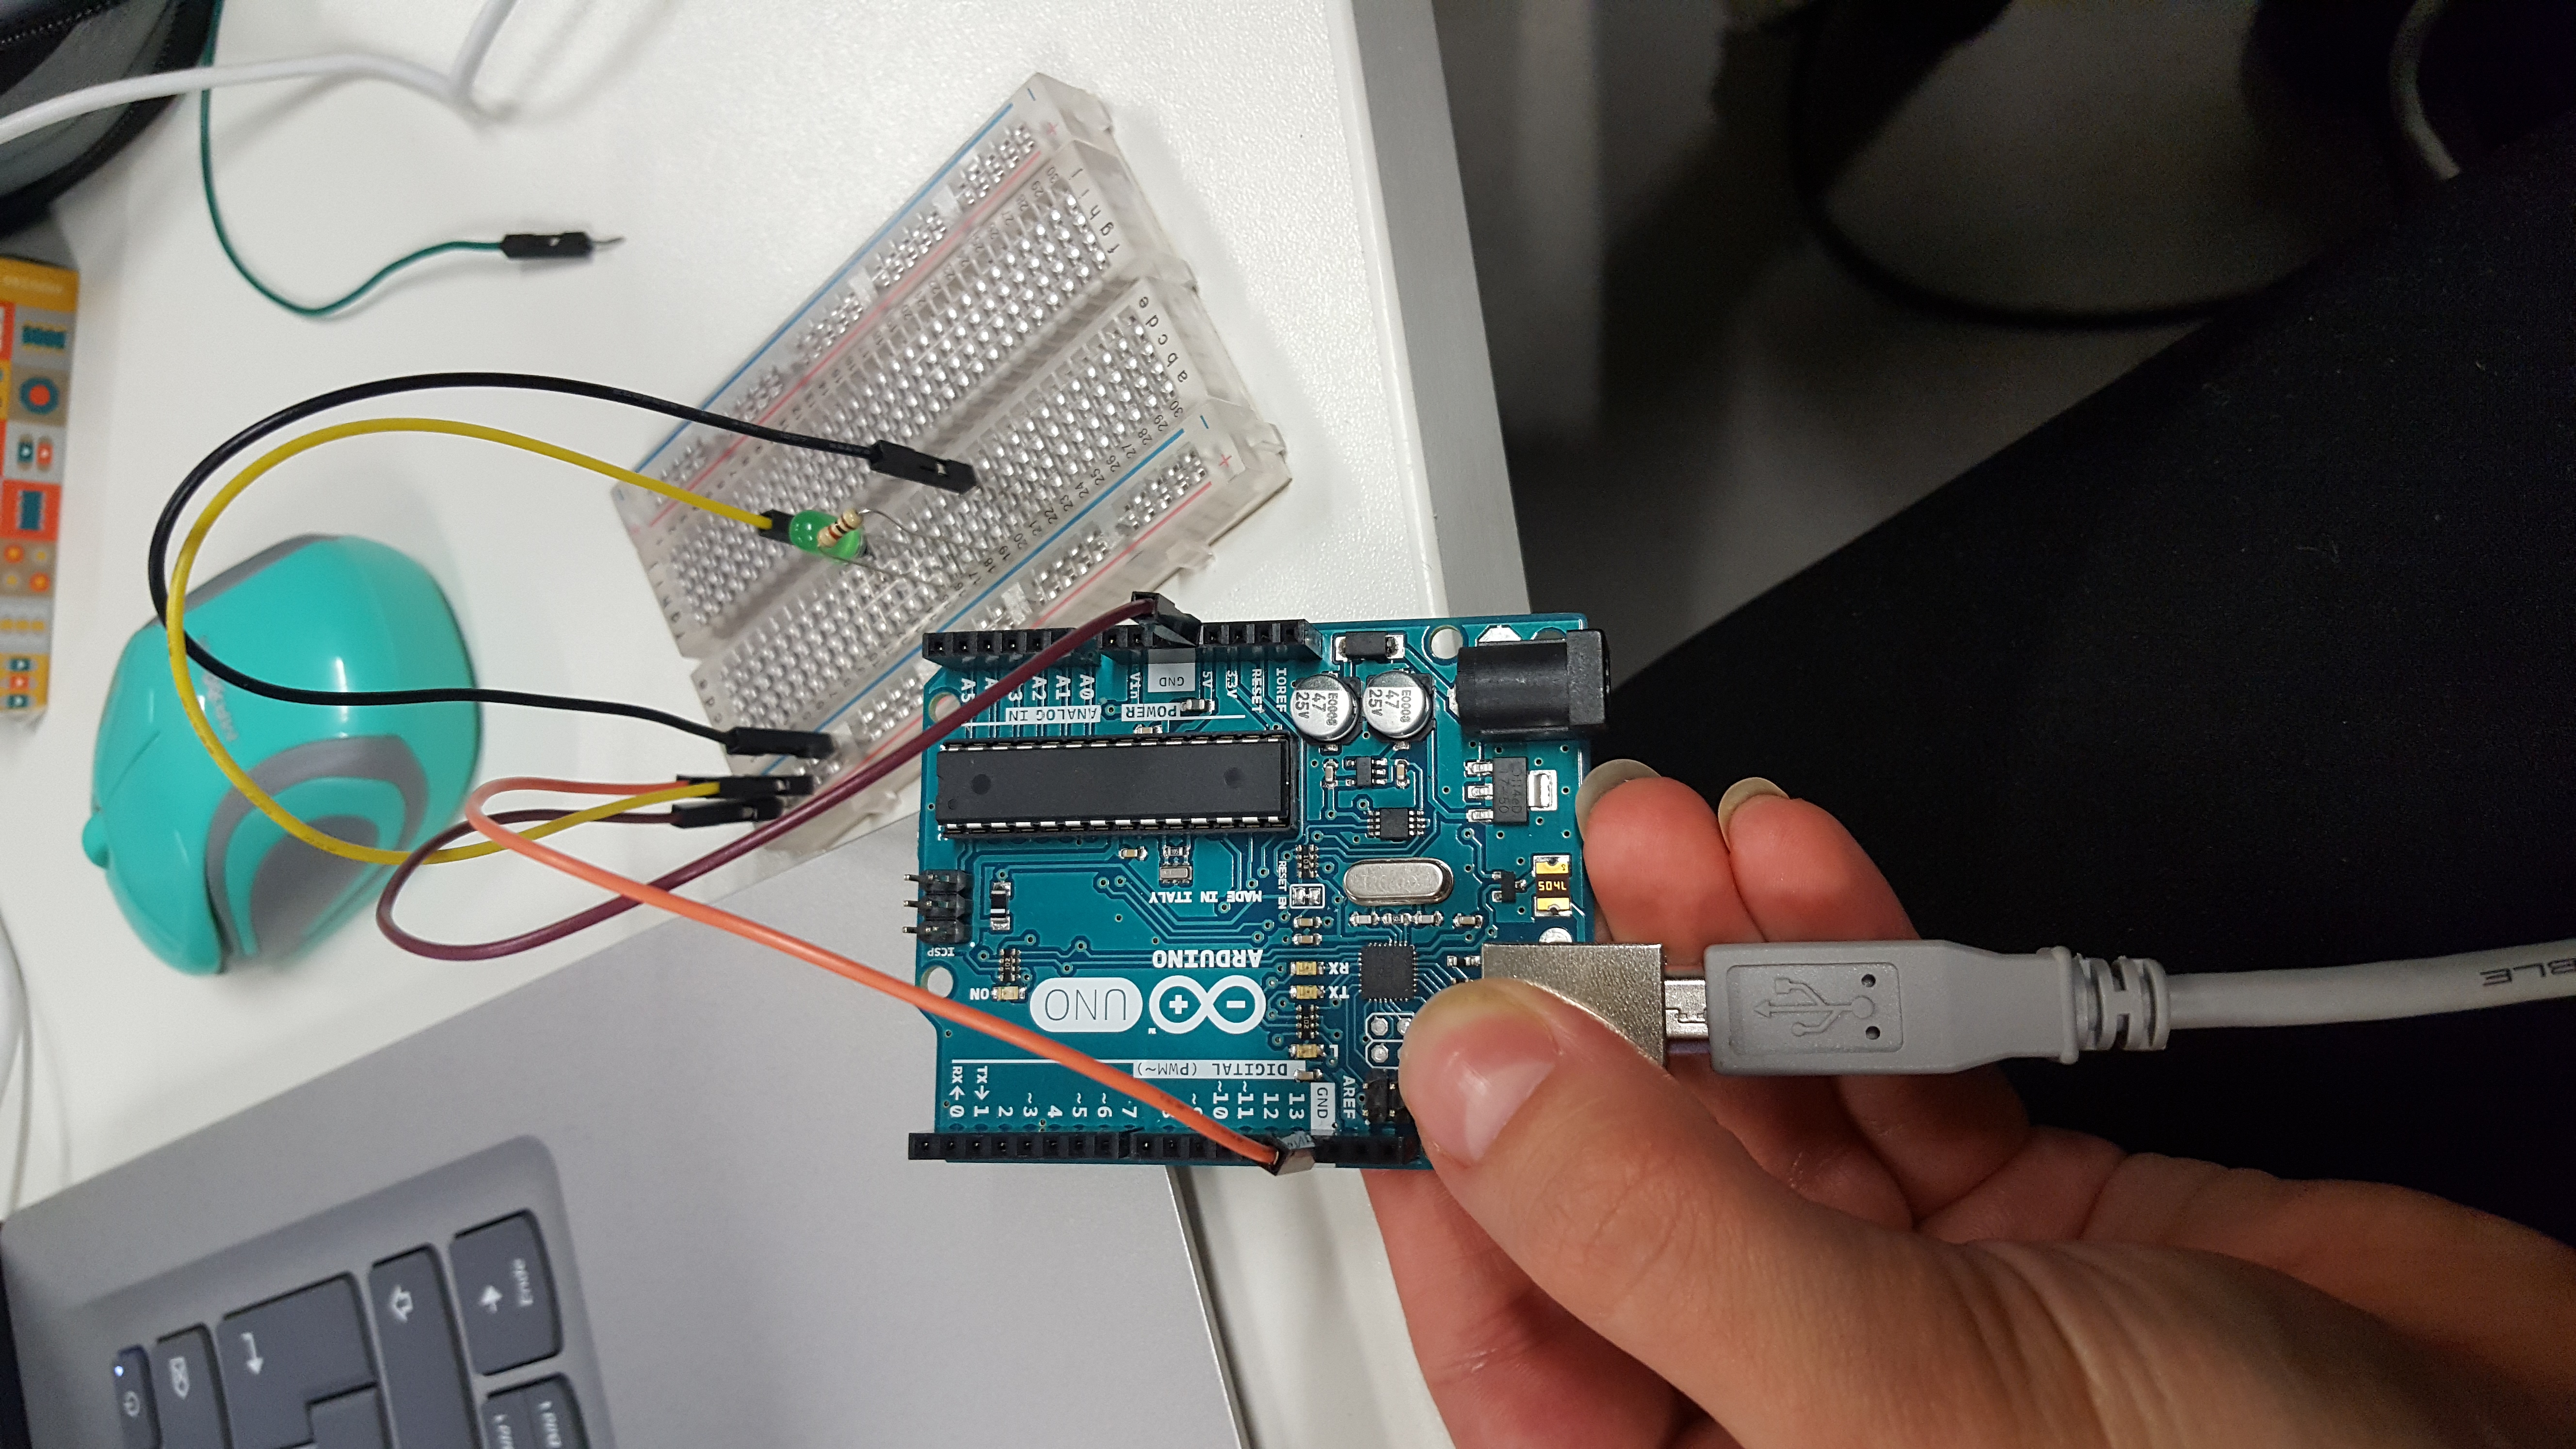
This is the Arduino board,in which we connect the LED and the resitors,our working bench.
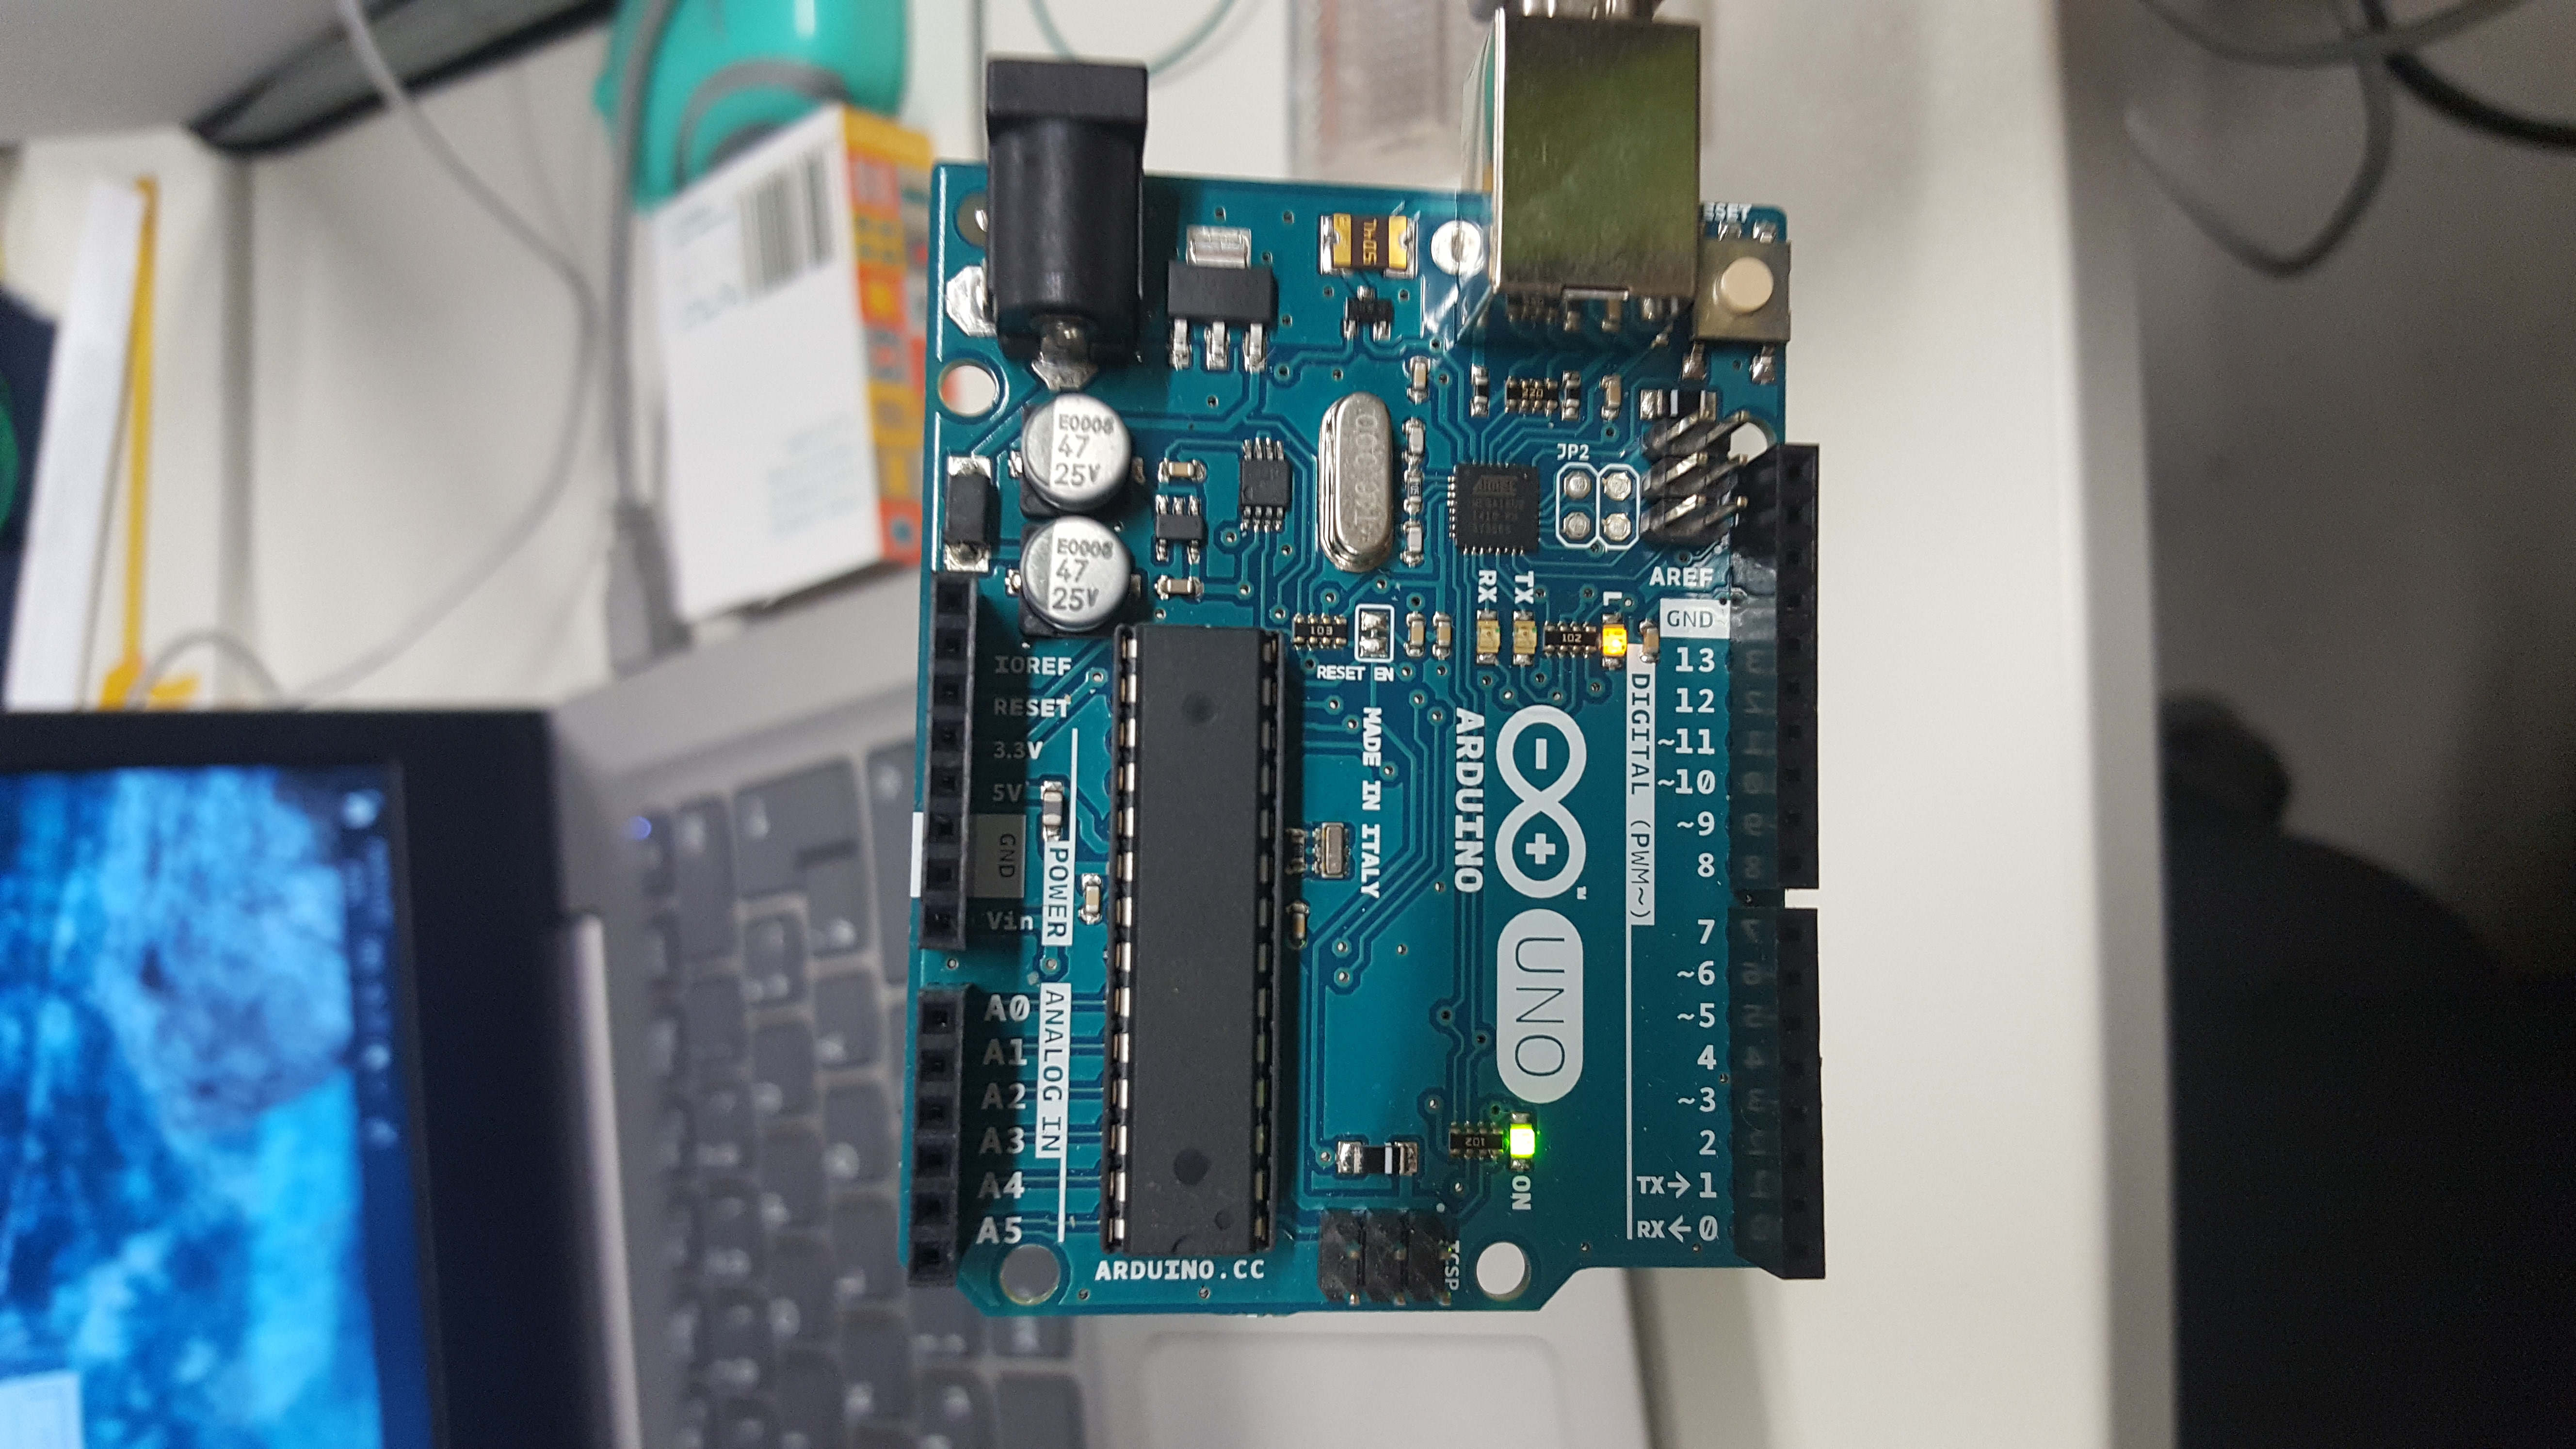
In this picture we connect the board into the computer with USB cable,using the program Arduino.
Introduction to the Engineering design process
The professor of our group introduce us the steps and processes of engineering design.It was really inetresting to get known with all necessary basic things of engineering and how important is this for our project.What is engineering design process?
The engineering design process is a series of steps that engineers follow to come up with a solution to a problem. Many times the solution involves designing a product (like a machine or computer code) that meets certain criteria and/or accomplishes a certain task.
The steps of the engineering design process are to:
- Define the Problem
- Do Background Research
- Specify Requirements
- Brainstorm Solutions
- Choose the Best Solution
- Do Development Work
- Build a Prototype
- Test and Redesign
Engineers do not always follow the engineering design process steps in order, one after another. It is very common to design something, test it, find a problem, and then go back to an earlier step to make a modification or change to your design. This way of working is called iteration, and it is likely that your process will do the same!
source:https://www.sciencebuddies.org/science-fair-projects/engineering-design-process/engineering-design-process-steps
Introduction to the working people with disabilities,with the company Bottroper Werkstaten GmbH,integrating them into the special working environment.
We had a representative from this company who explained to us what the company is doing and how it helps people with disabilities can be integrated into a normal work environment.
After that we start do discuss about our ideas for the final project and forming groups.
Introduction to Knitting Machine
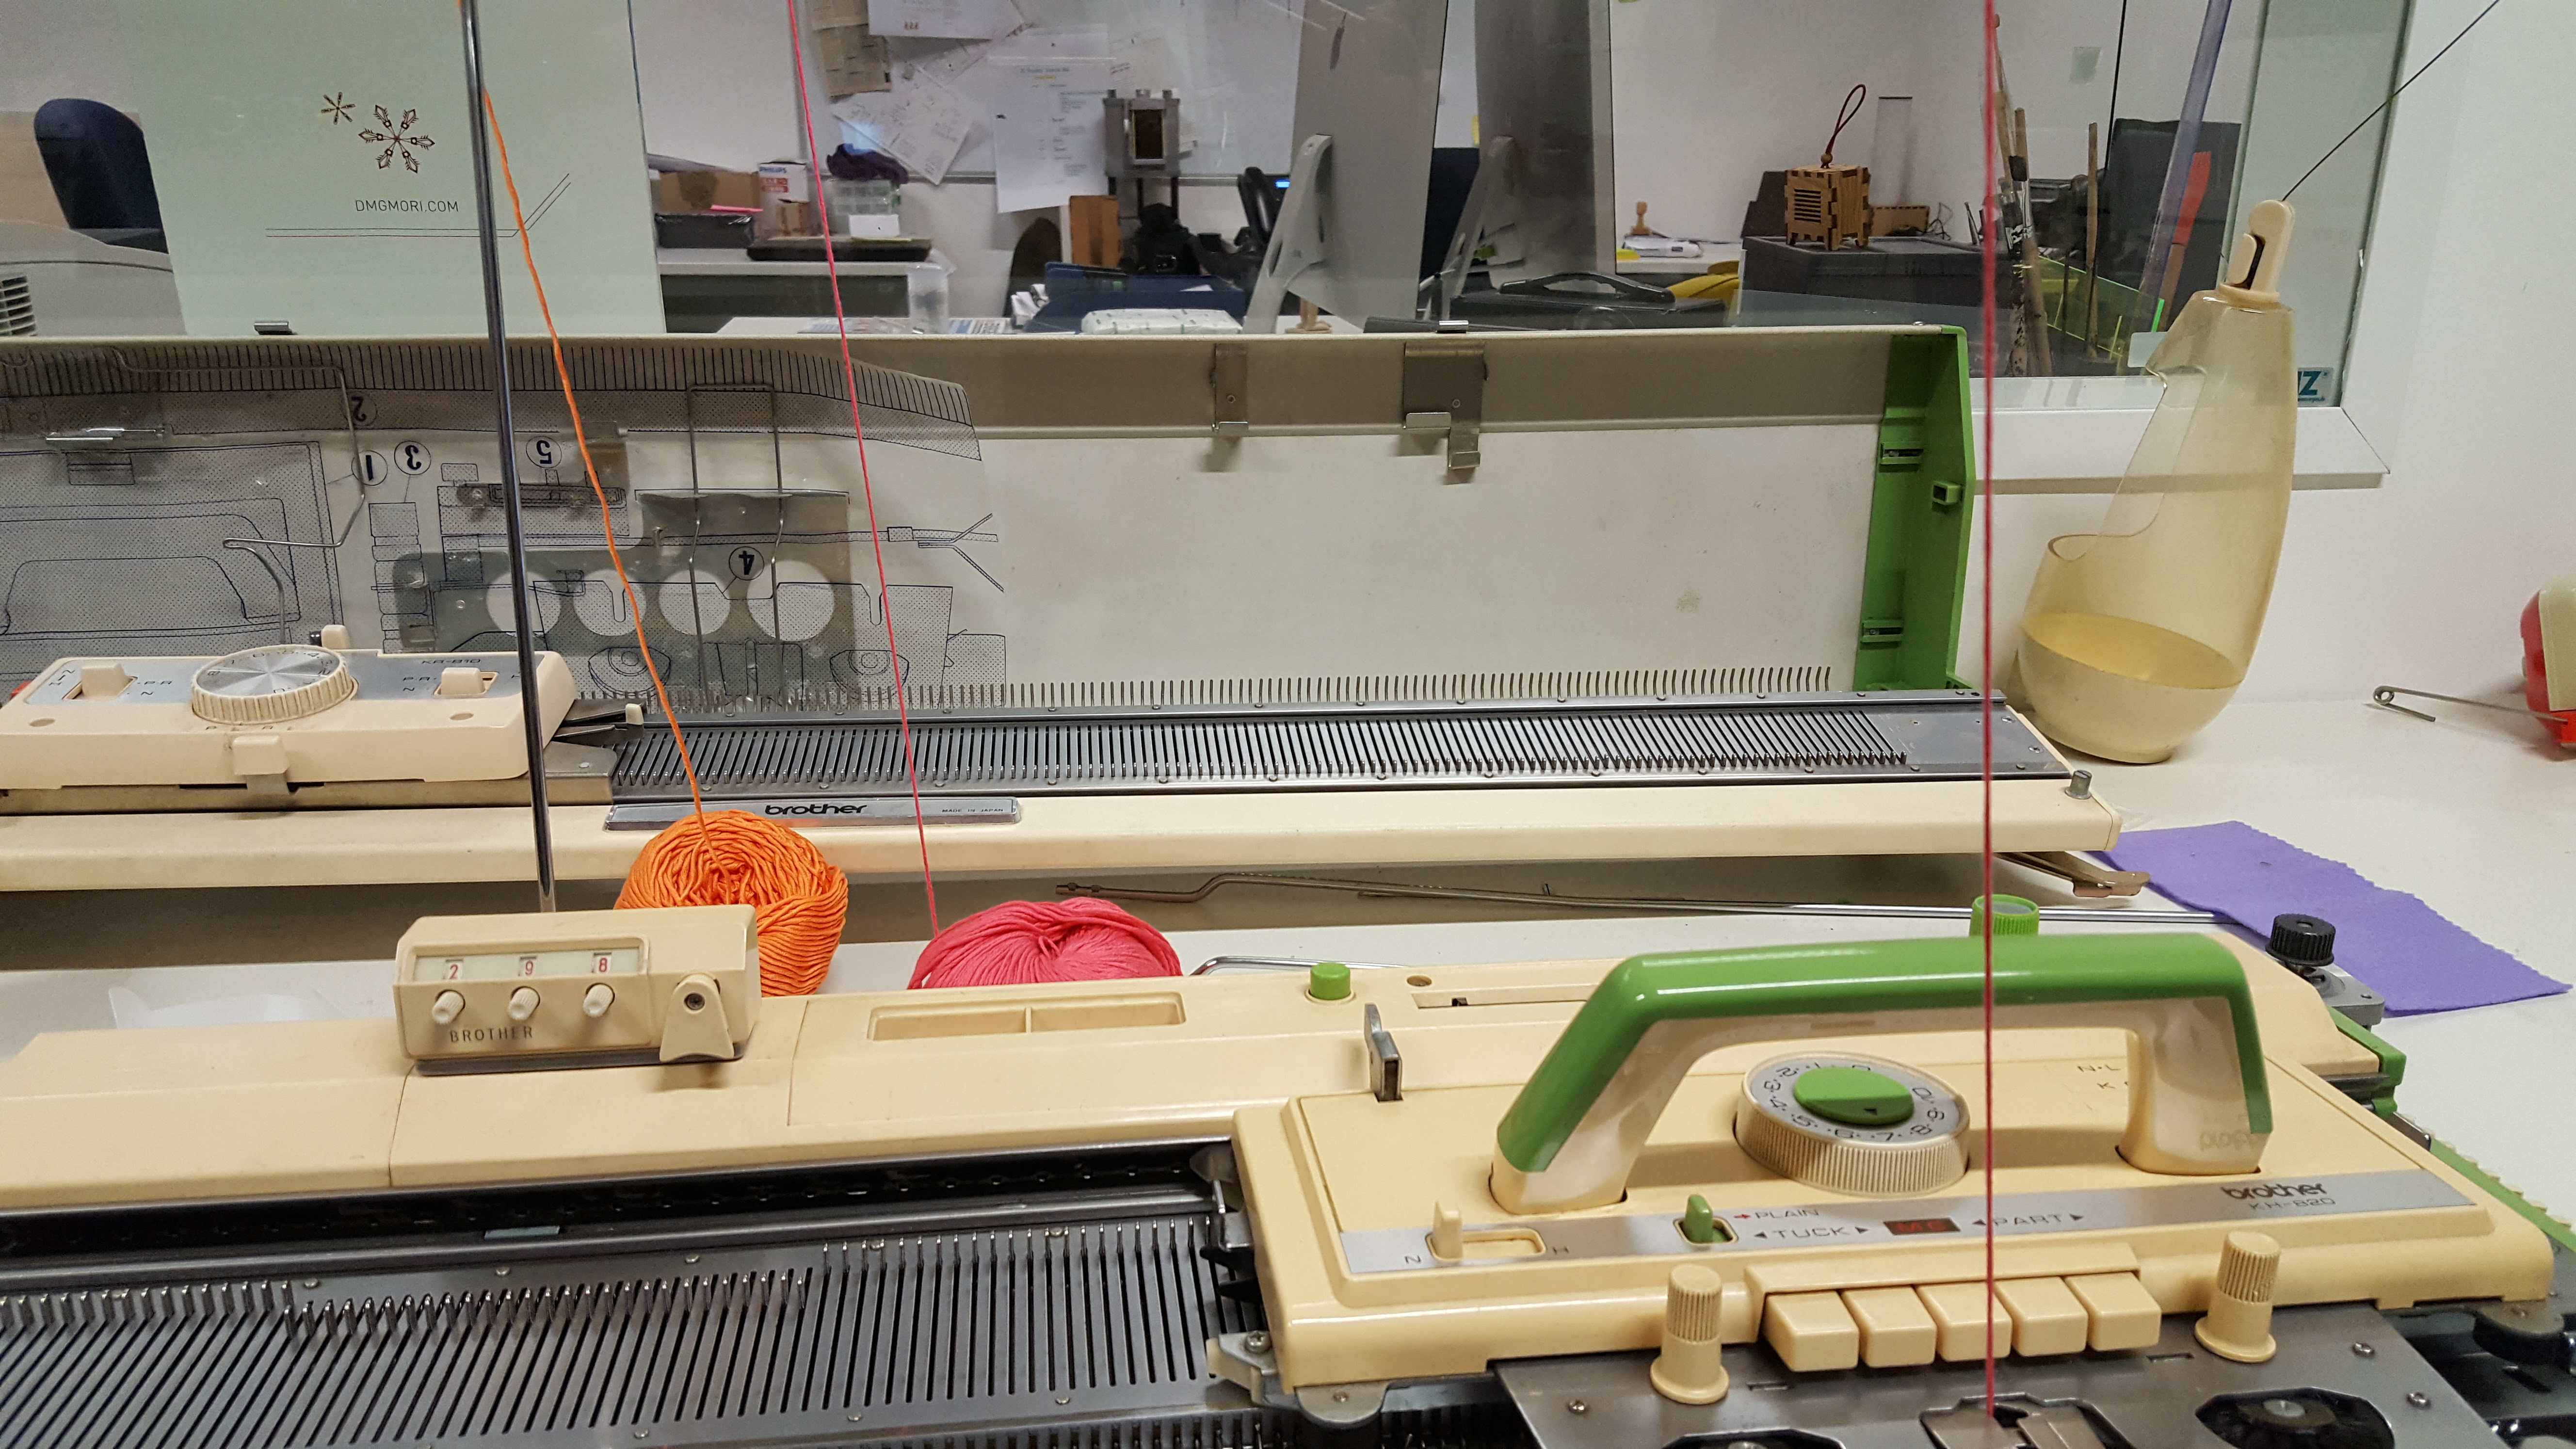
Last but not at least,we was pleased to get familiar with the Knitting machine.How it works?
A knitting machine is a device used to create knitted fabrics in a semi or fully automated fashion.
There are numerous types of knitting machines, ranging from simple spool or board templates with no moving parts to highly complex mechanisms controlled by electronics. All, however, produce various types of knitted fabrics, usually either flat or tubular, and of varying degrees of complexity. Pattern stitches can be selected by hand manipulation of the needles, or with push-buttons and dials, mechanical punch cards, or electronic pattern reading devices and computers.
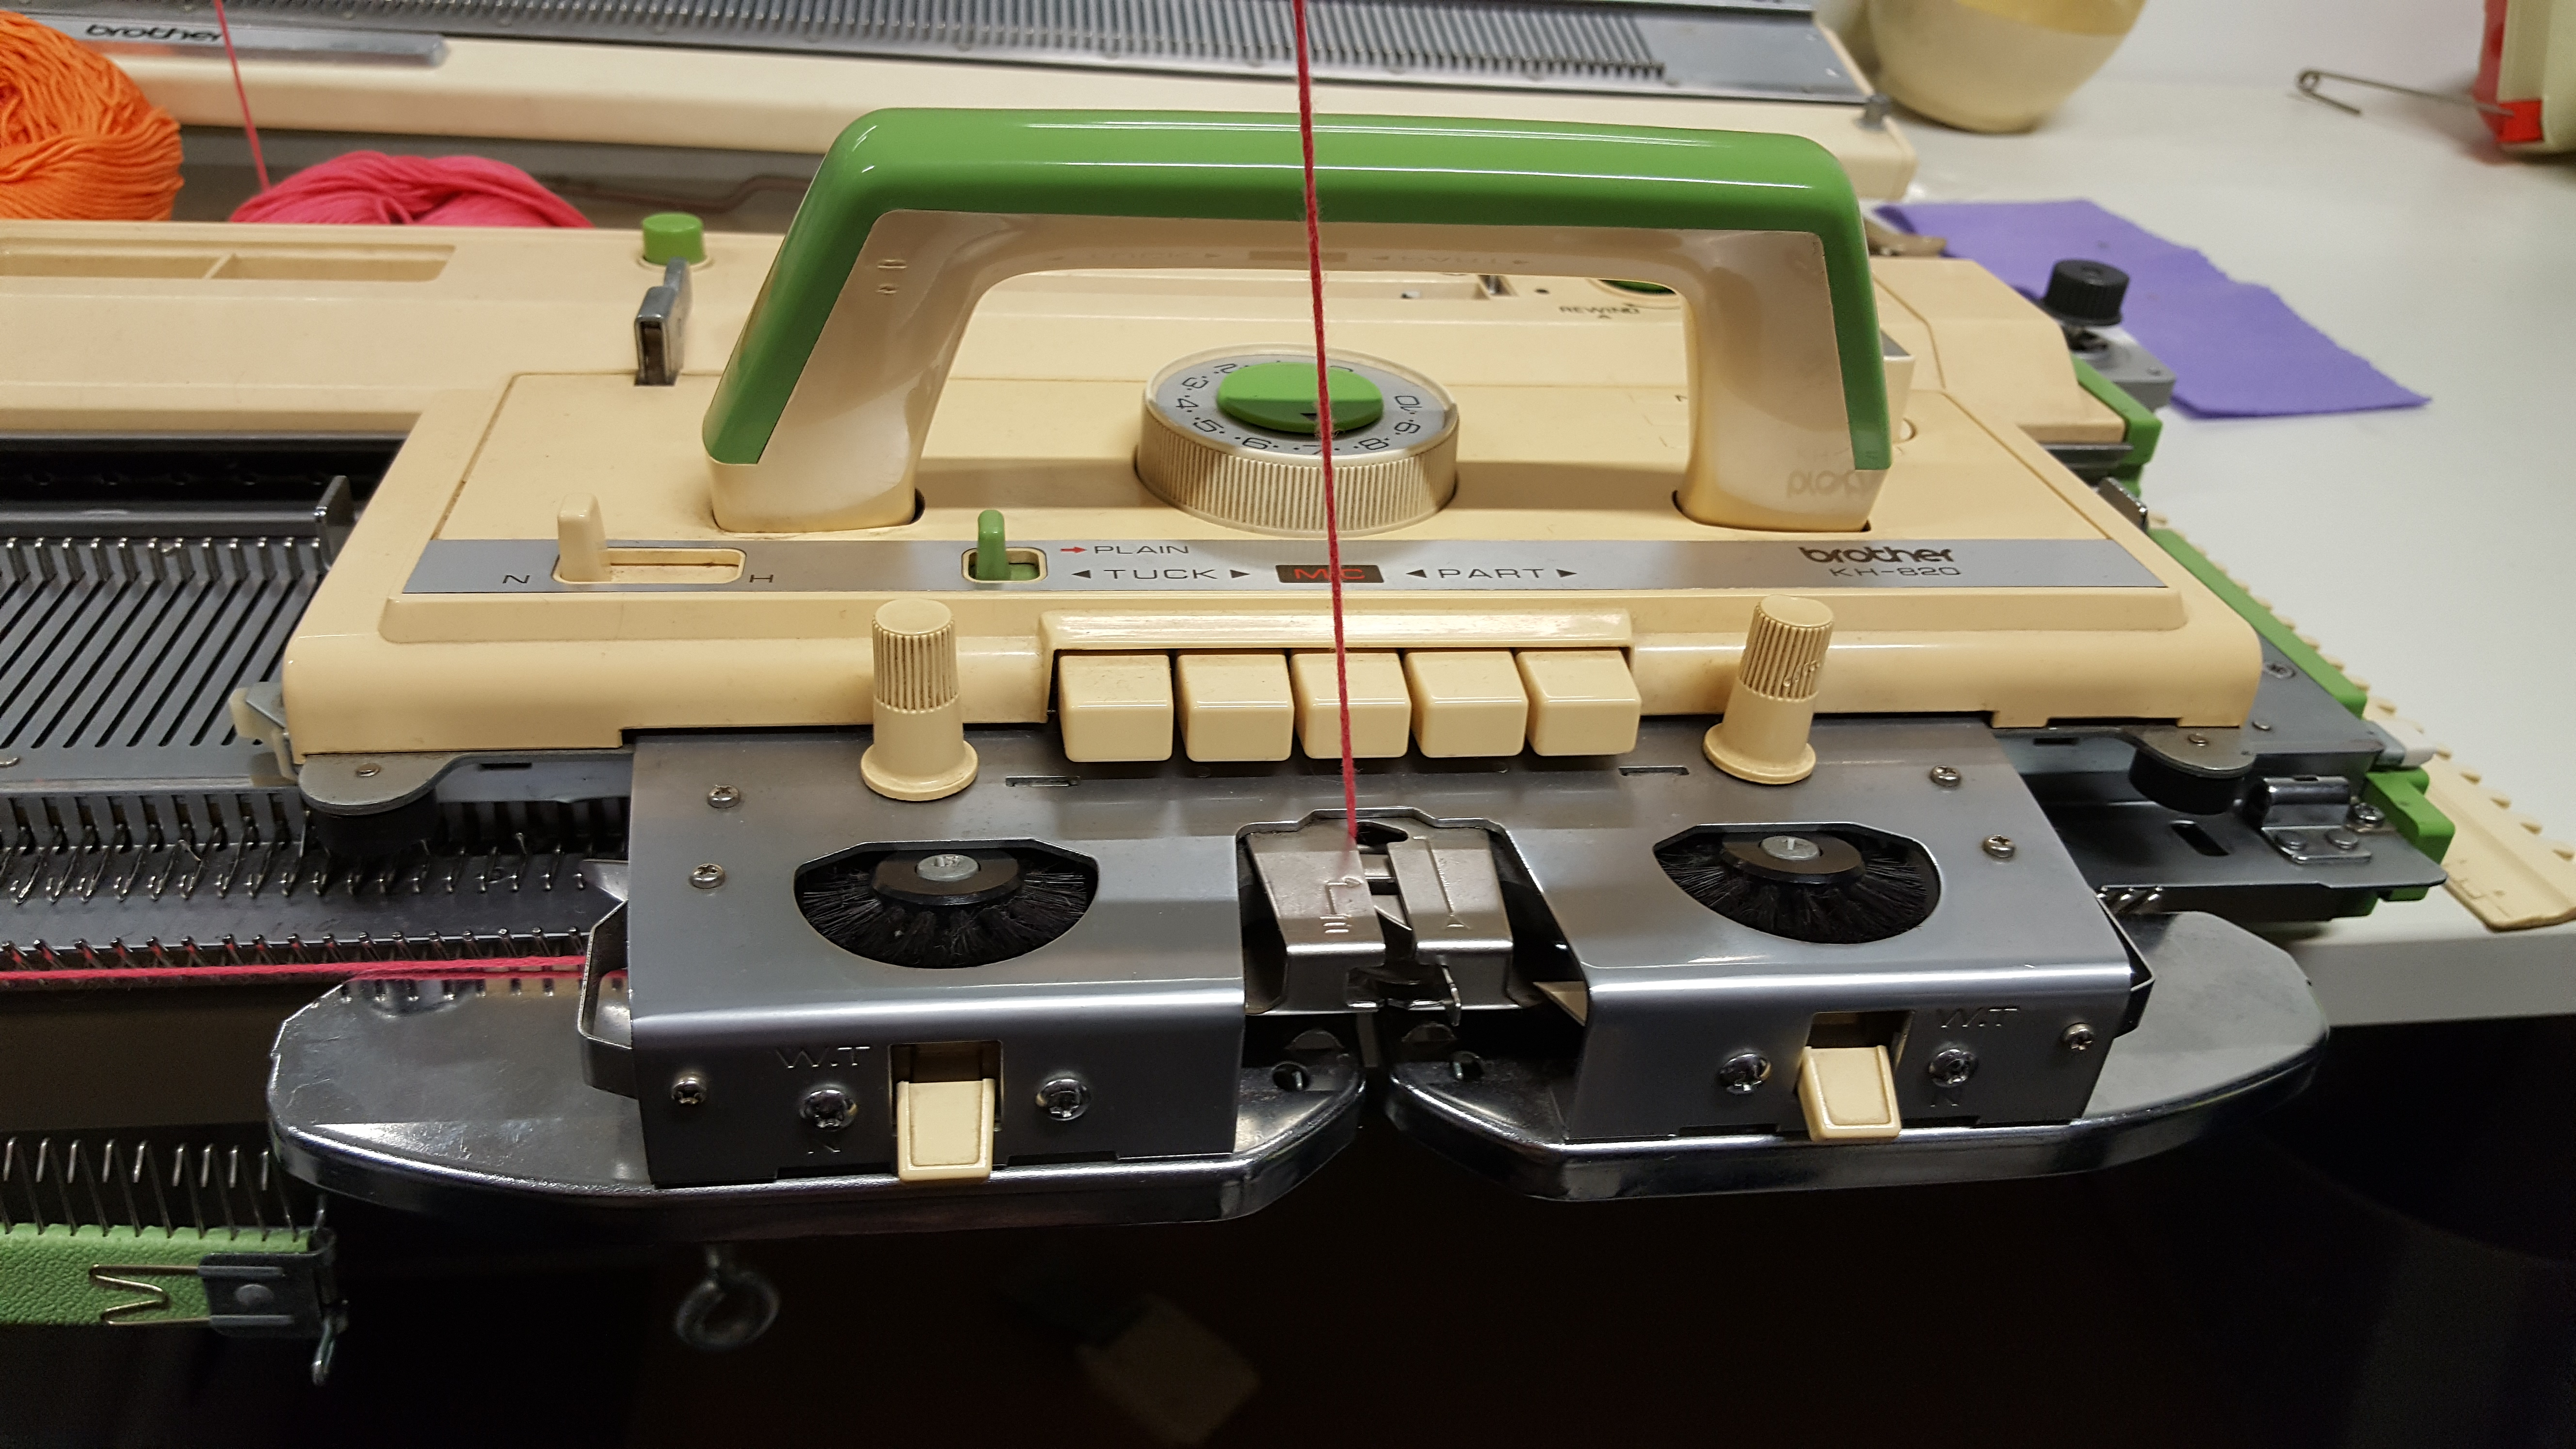
The process:
- The needle bar goes forward- the open needles clear the web
- The weft thread is laid on the needles
- The weft thread falls loosely
- The needle bar draws back, the weft is pulled in the open needles
- The needle bar draws back, the presser bar drops, the needle loops close and the weft is drawn back through the web
- The needles open, a new row has been added to the web which drops under gravity
source:https://en.wikipedia.org/wiki/Knitting_machine
The knitting part was really interesting especially for me ,because I had the opportunity to try the machine,to see how it works and to make a simple pattren.
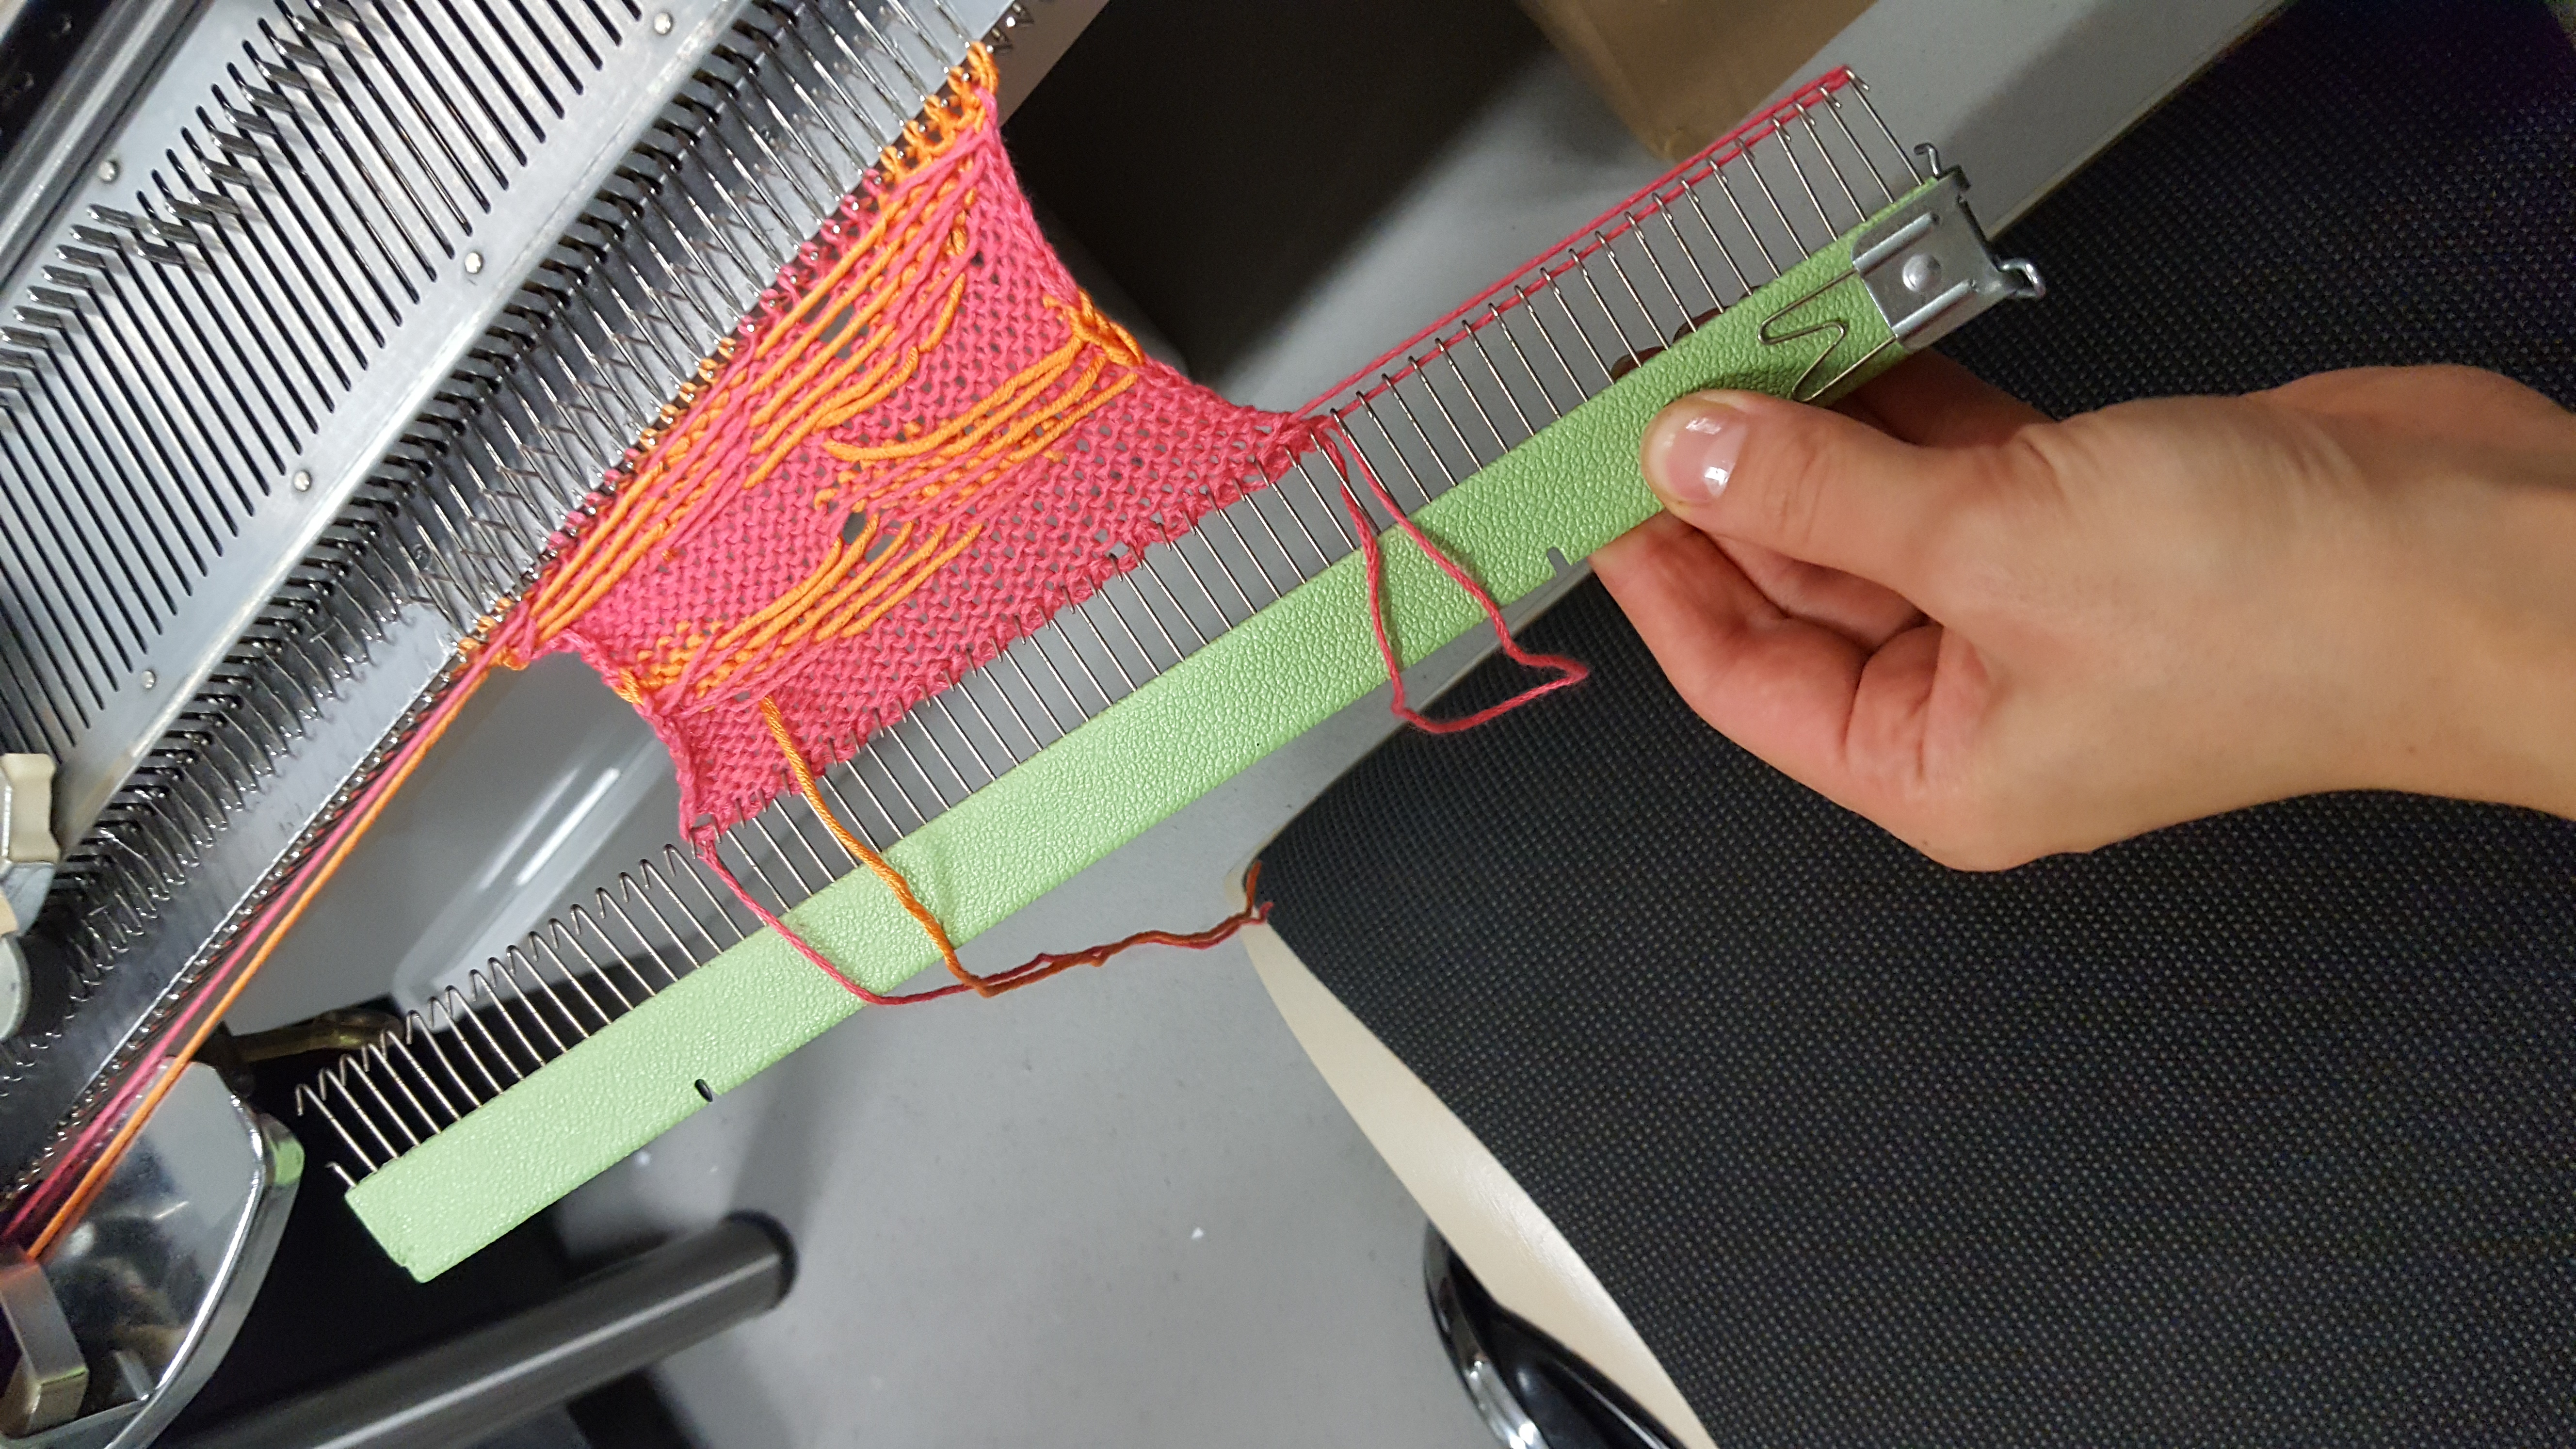
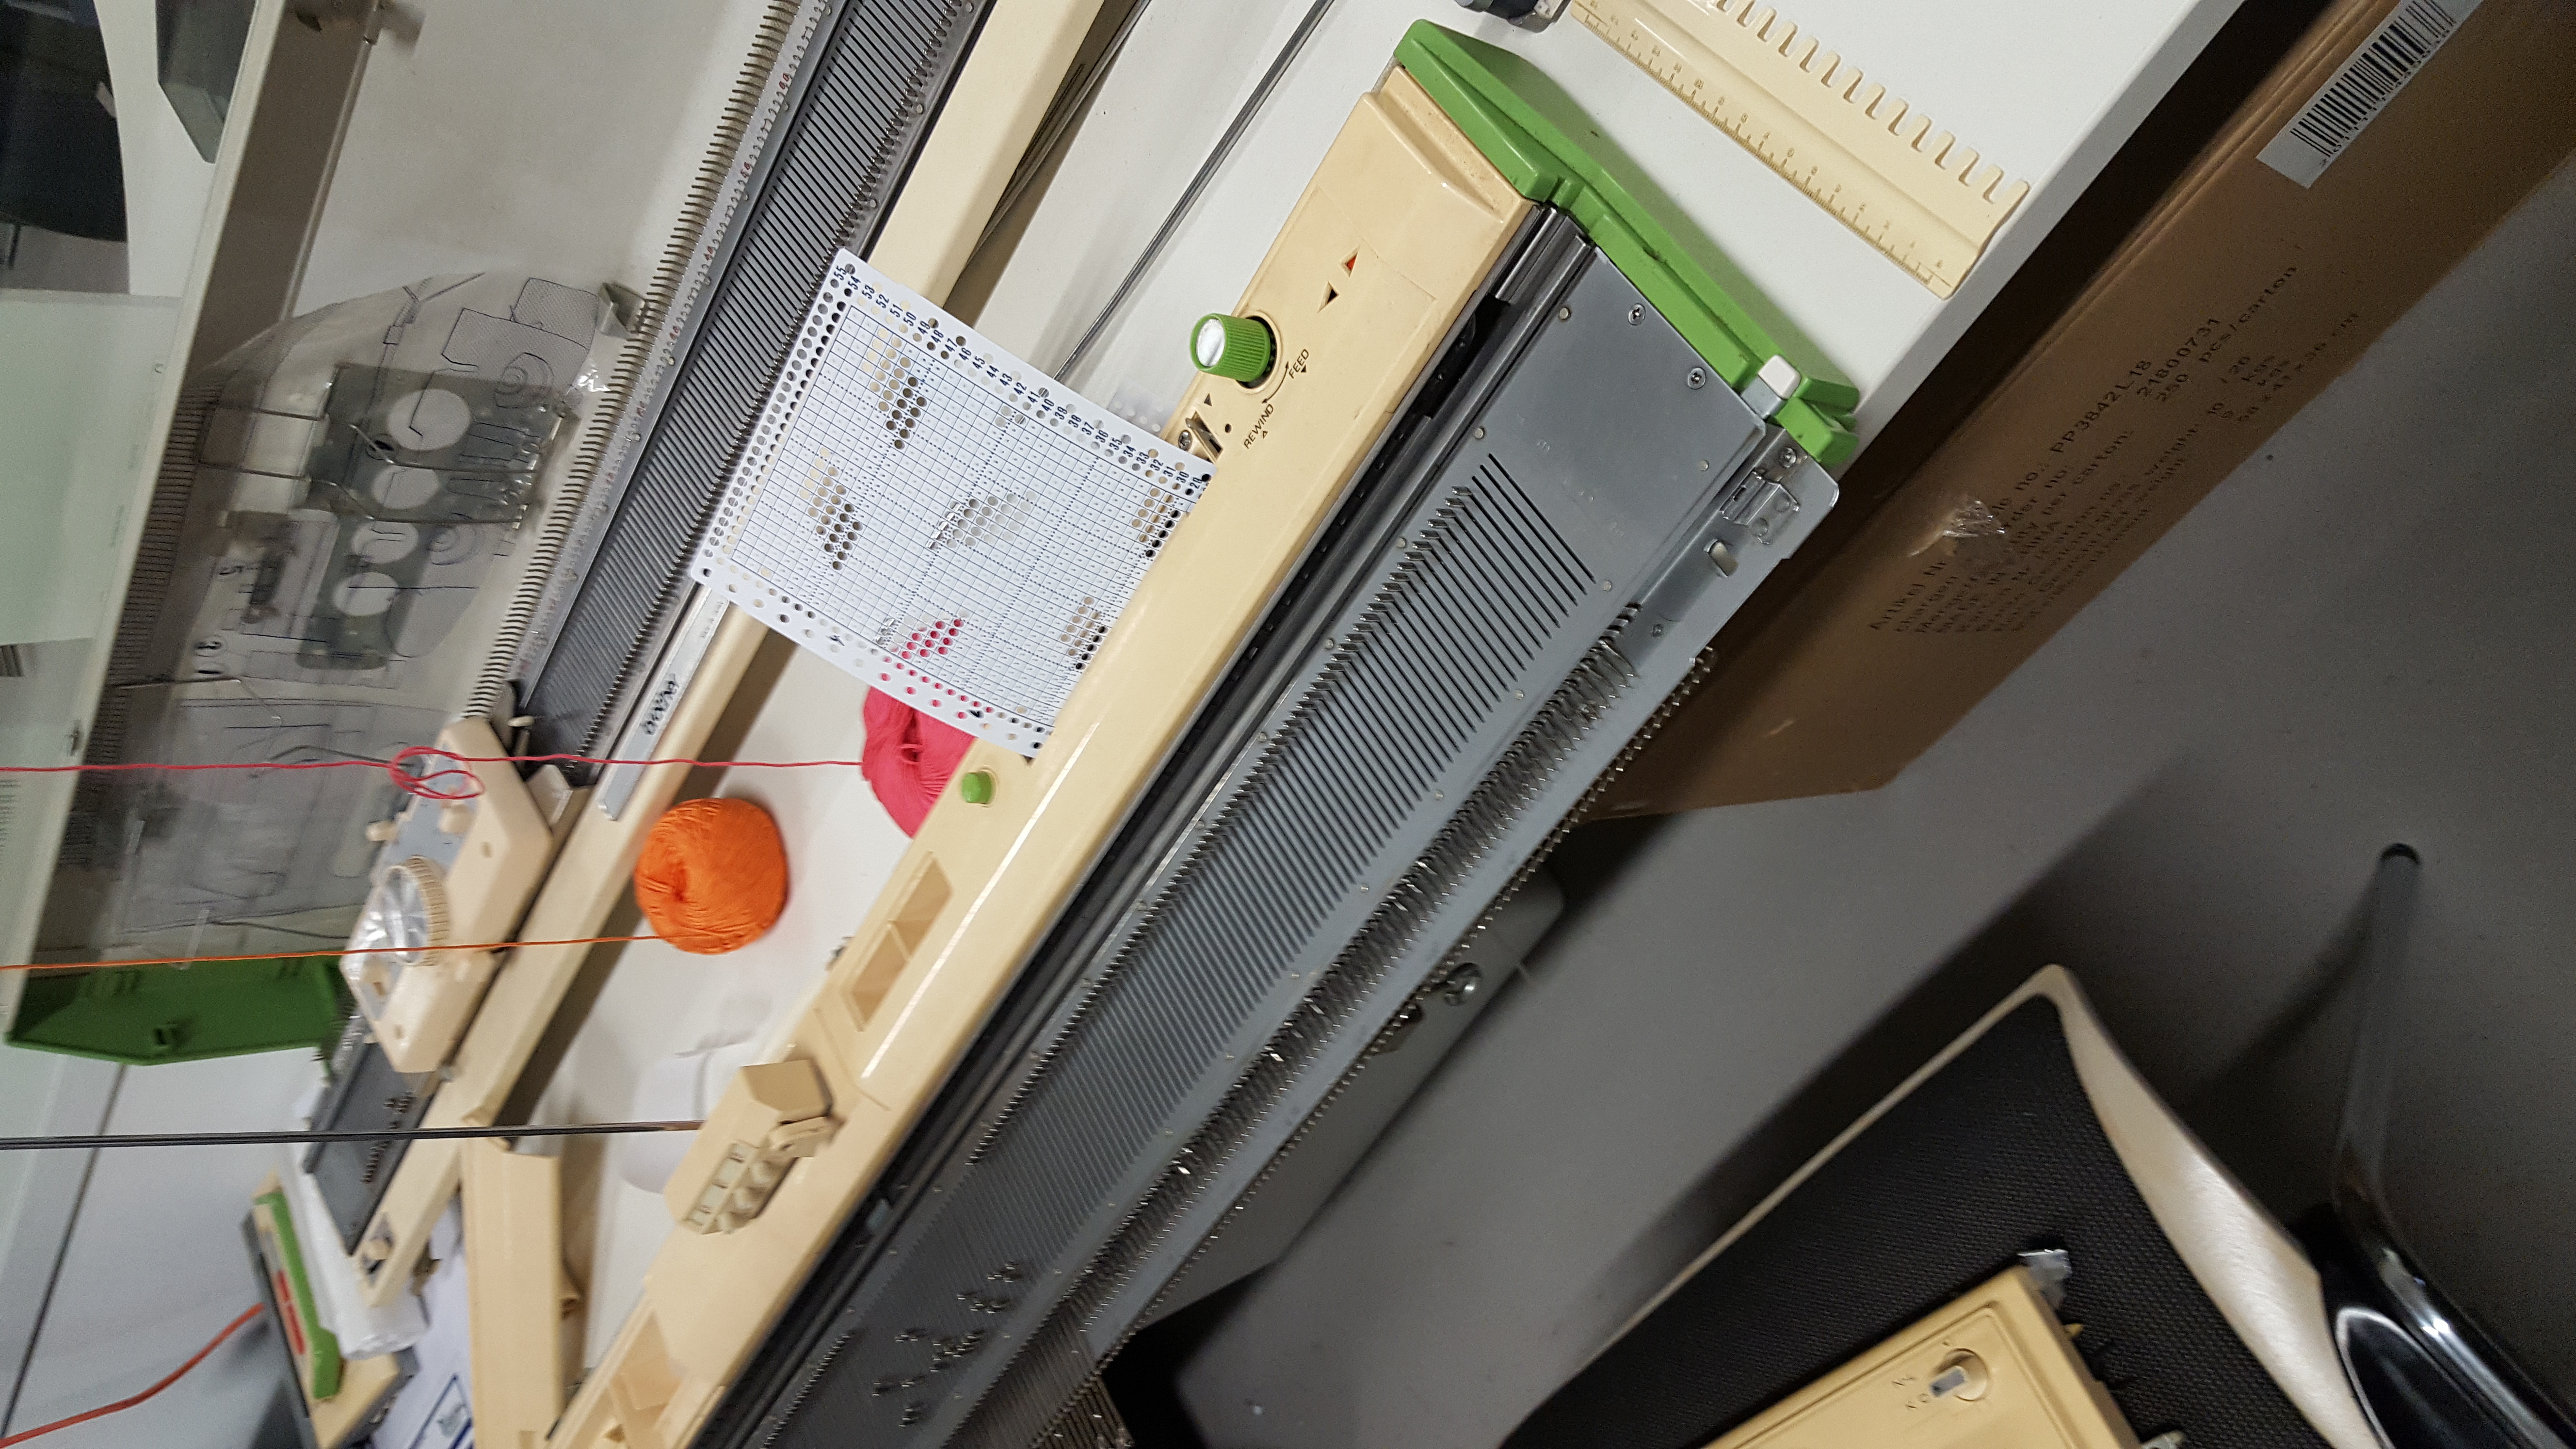
After choosing the colours and the types of the threads,I start to work with the knitting machine.It has to be done manually by hand,but actually it depends what we want to make for example a pullover its need a little bit time because its not electronic,but it also not that slow.
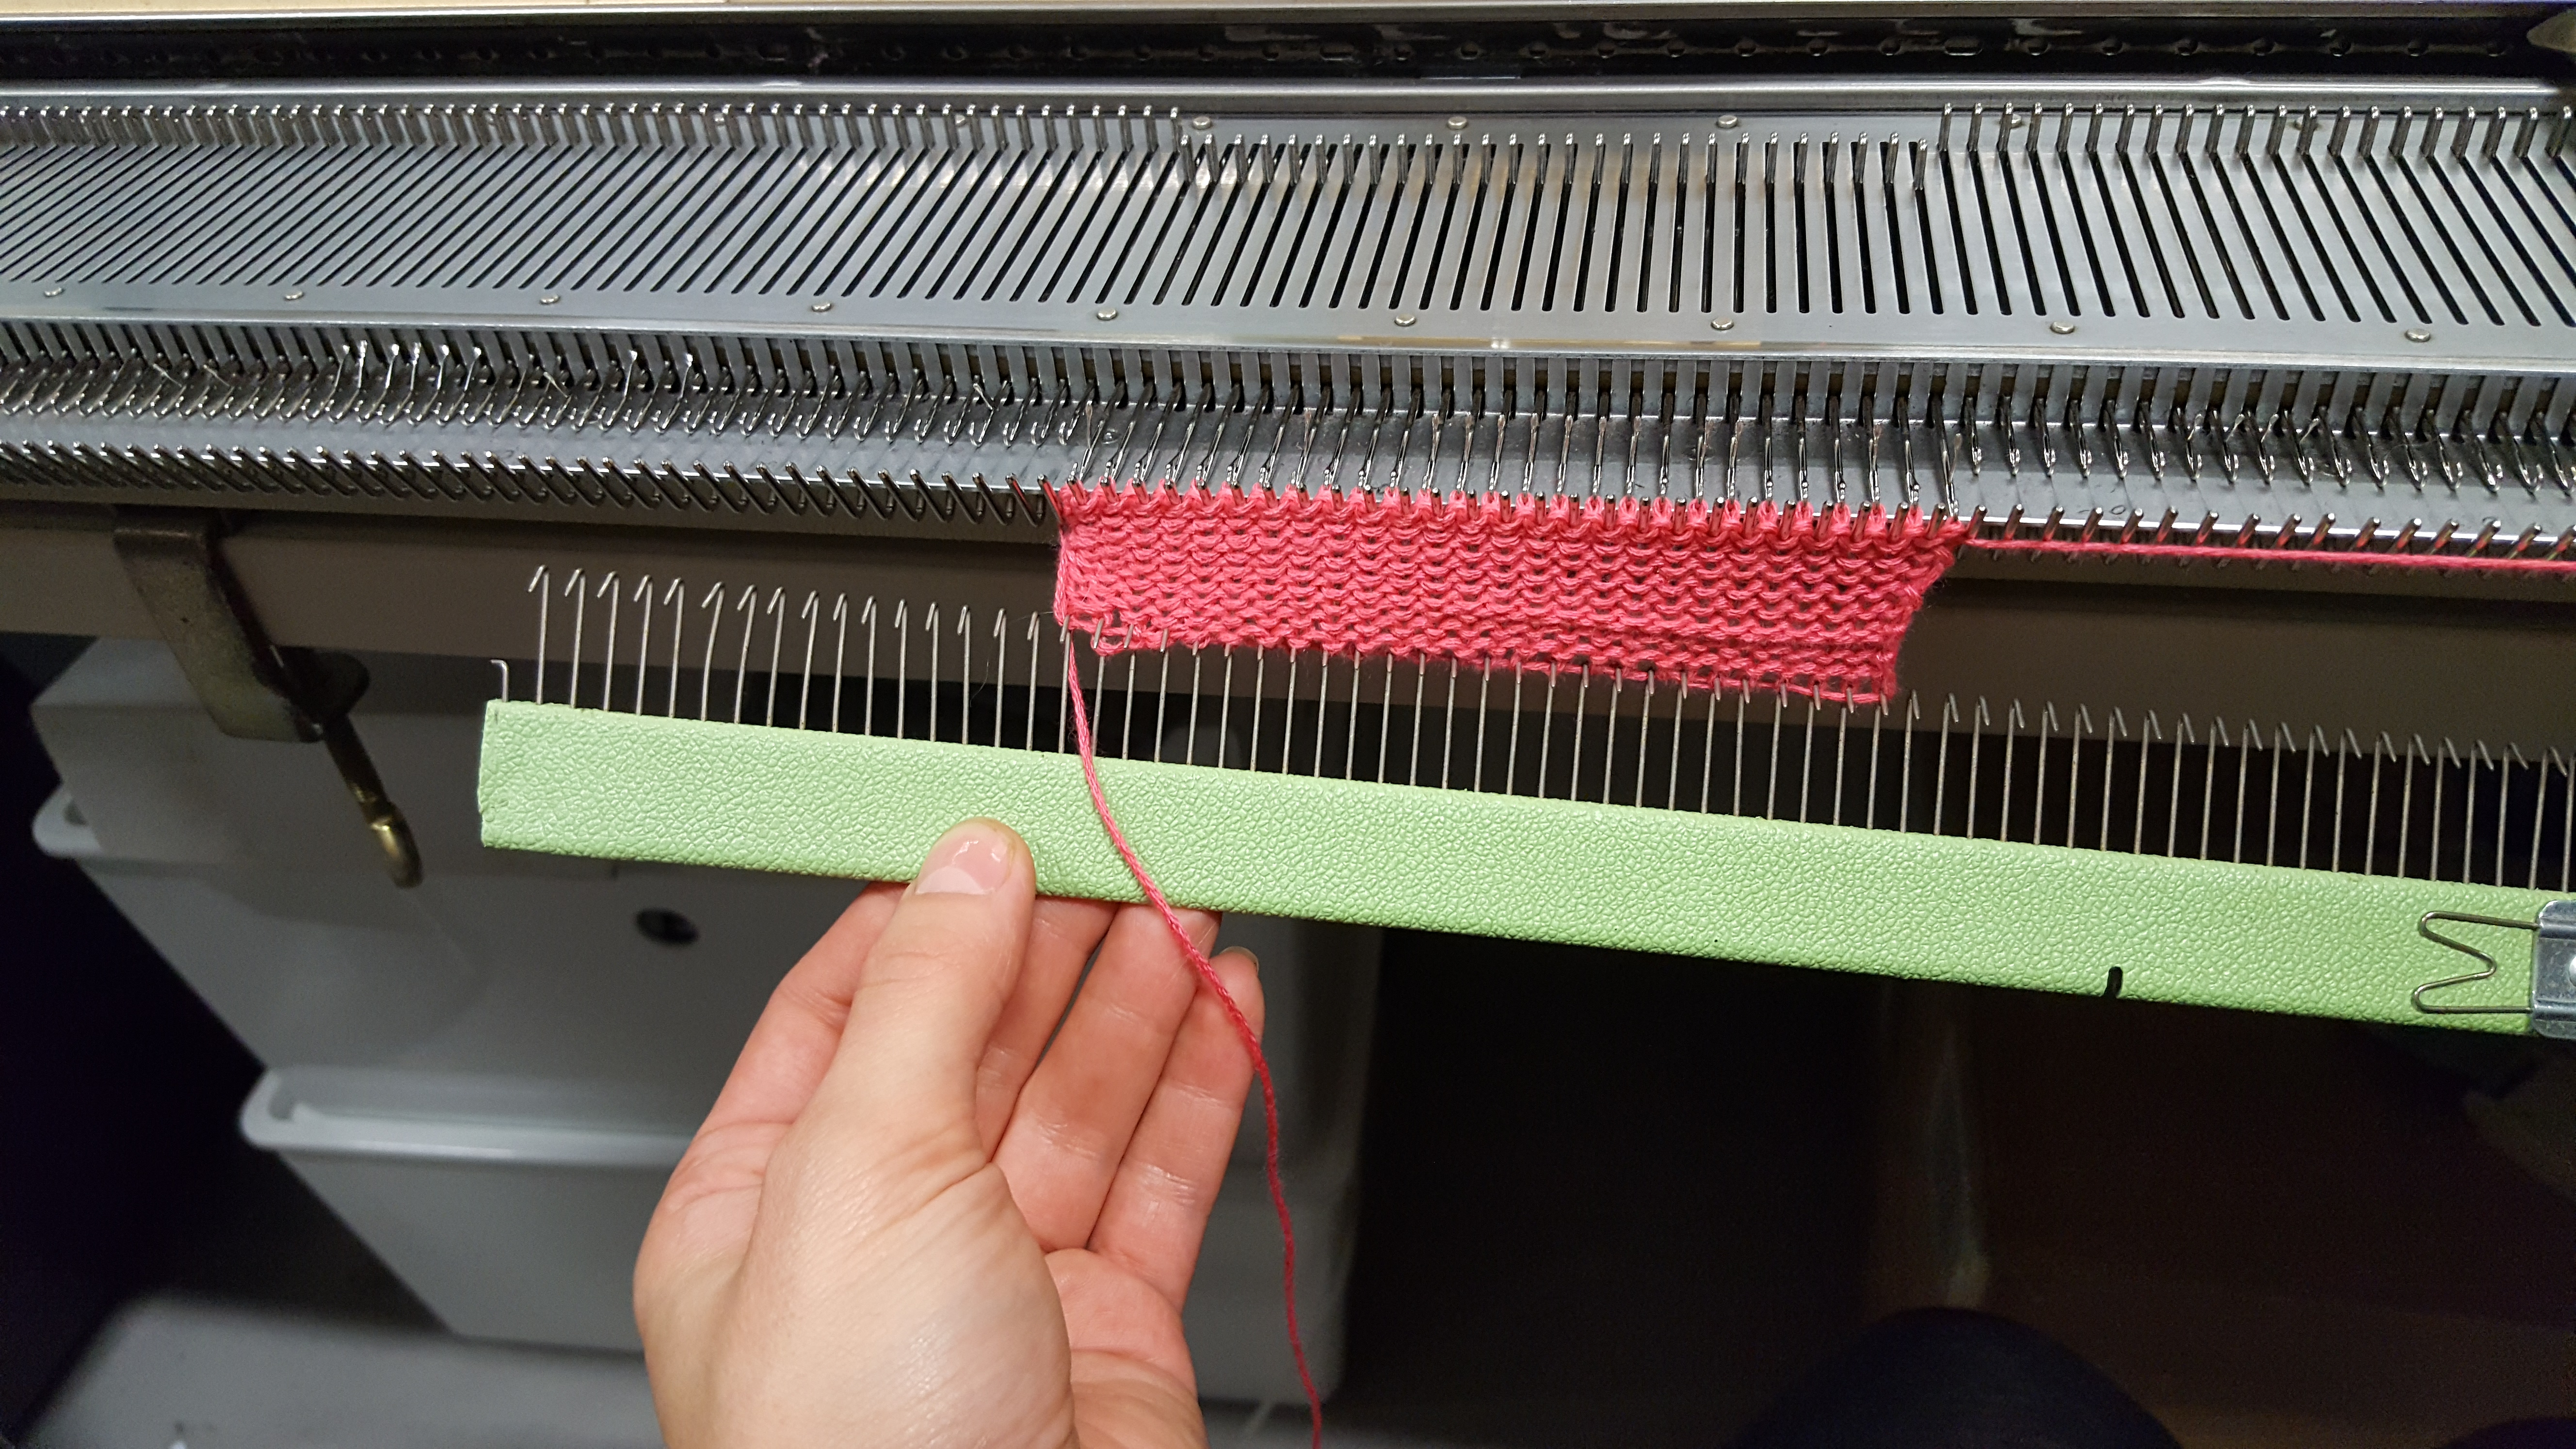
In addition,as shown in the pictures I try to make a pattern on the knitted material.It is done by putting a special paper(carton) with different designs,made electronically.
This is the pattern which I choose for making design over the knitted pattern.In addition,it was not perfect for the first time,but I enjoy it and it was really interesting,and great experience for me.
